Prerequisites
- Before working on this lab, You must have
- A computer running windows 2022 server Domain Controller.
- A computer running running windows 2022 or windows 10
- Installing DHCP Service
Network Topology

Step-by-Step Instructions
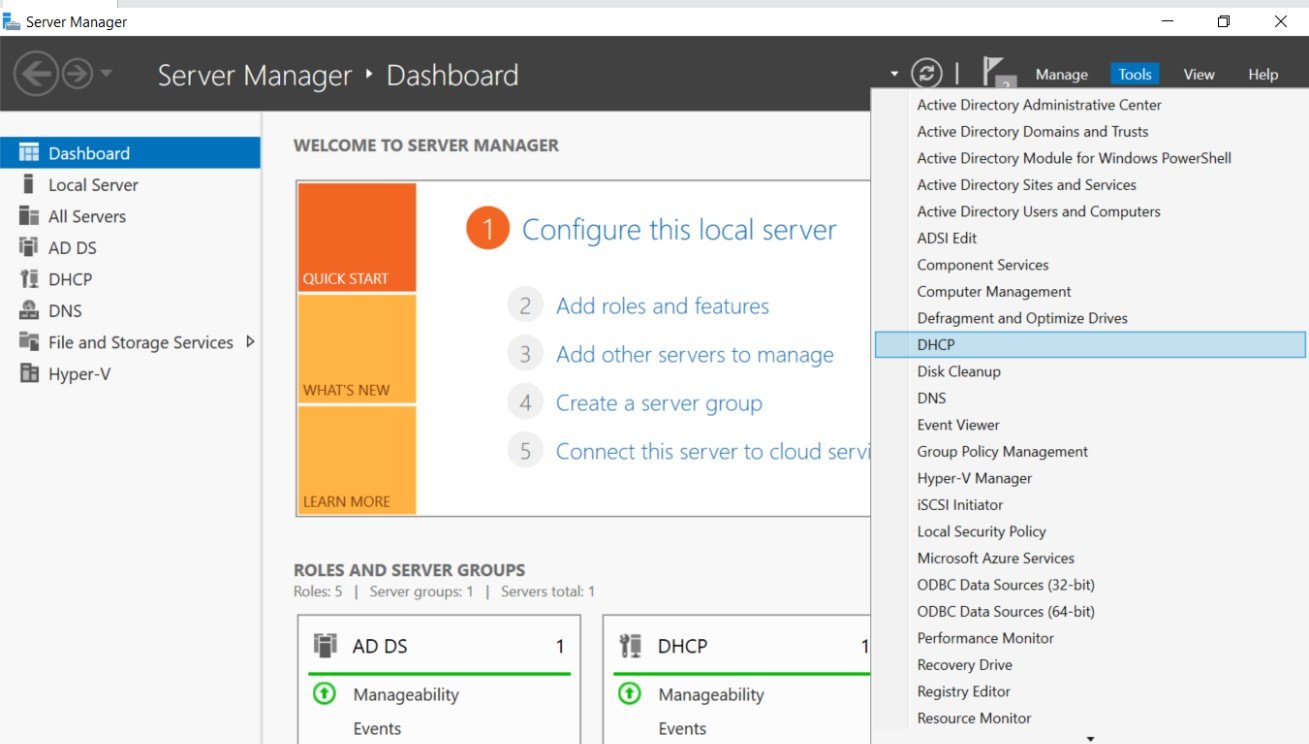
Step 1
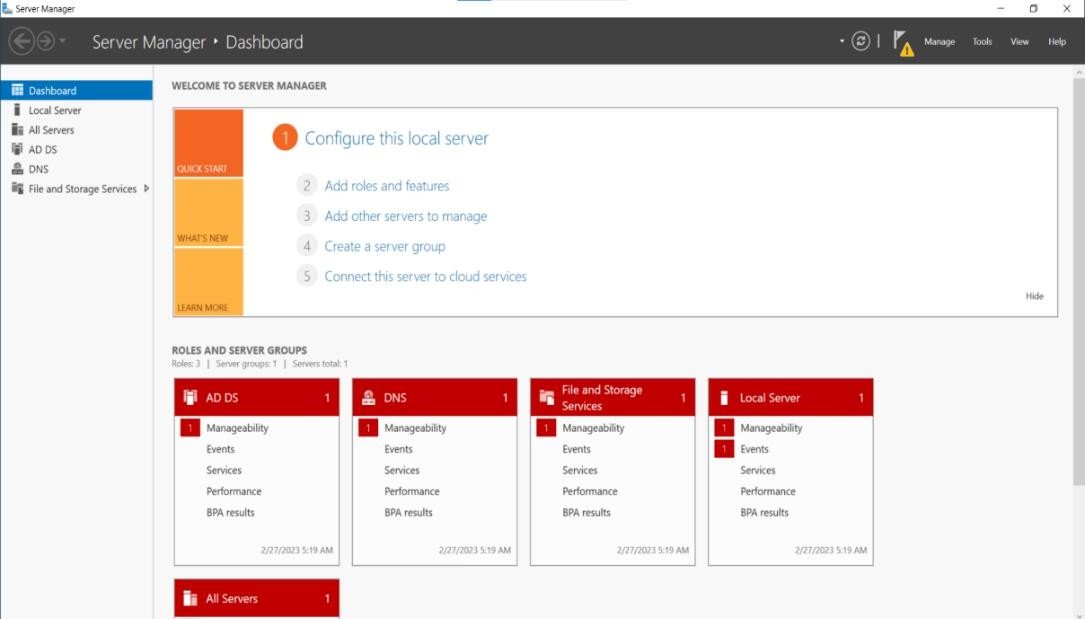
Click Server Manager
Step 2
In server Manager Console, Select Add roles and features
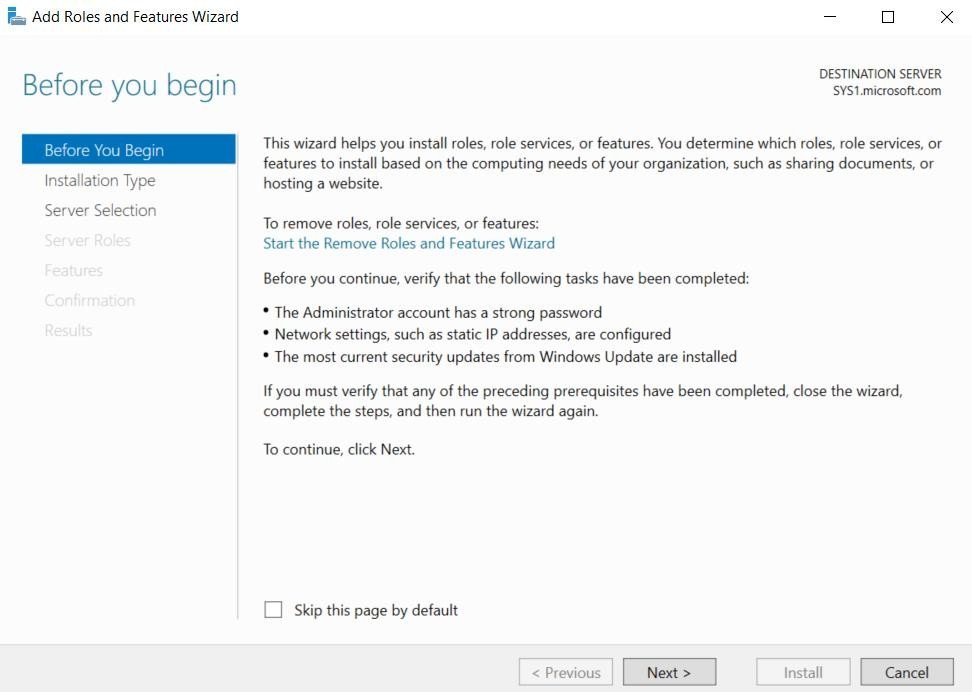
Step 3
In before you begin page, click Next.
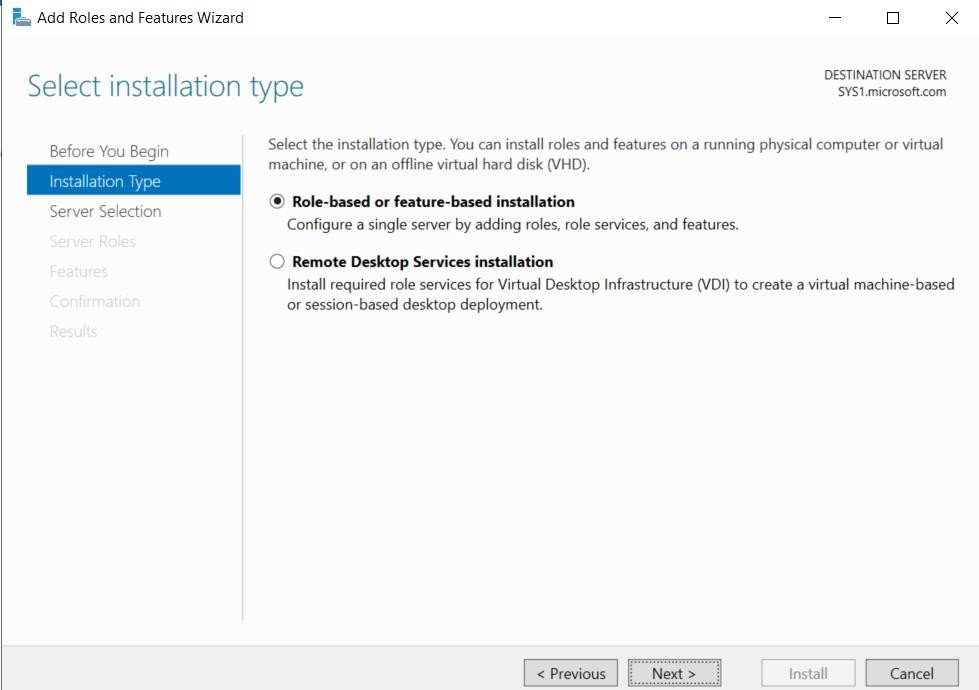
Step 4
Select Role-based or feature-based installation. click Next.
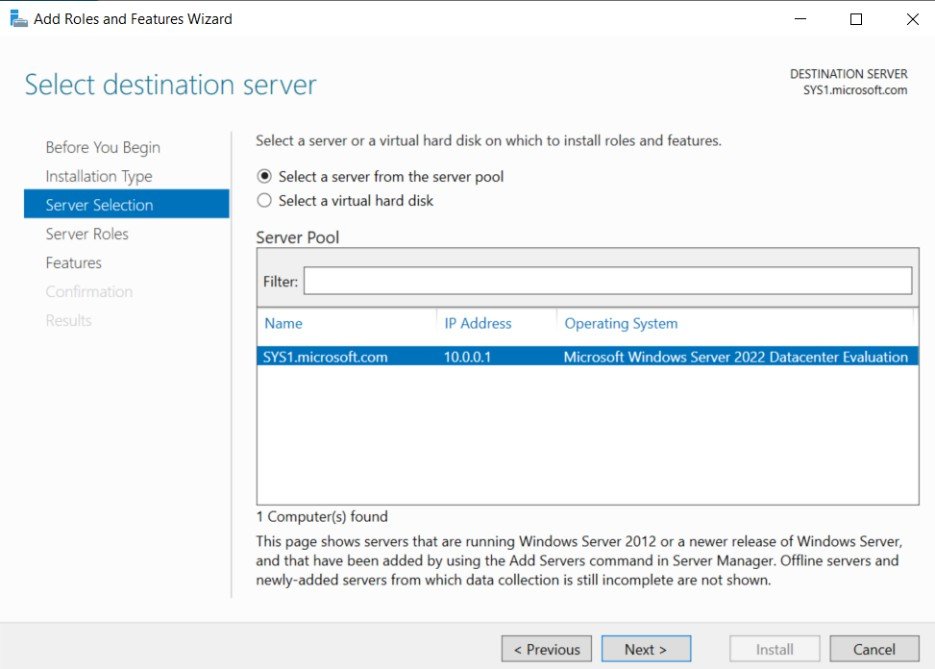
Step 5
Select a server (sys1.Microsoft. com) from the server pool and click Next.
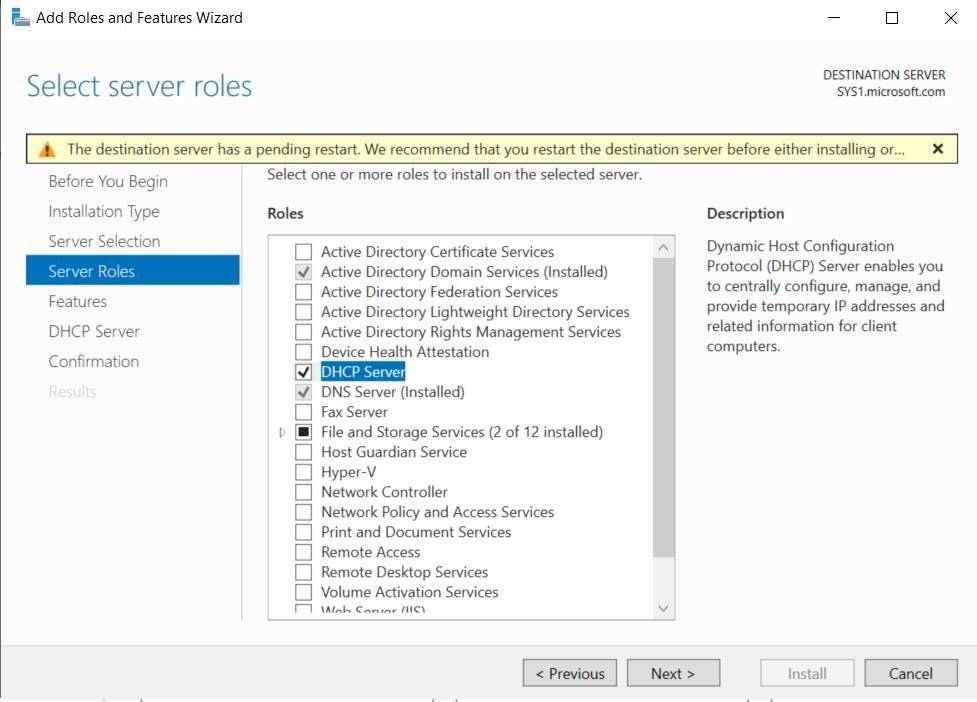
Step 6
In select server roles, check the box DHCP Server and click Next.
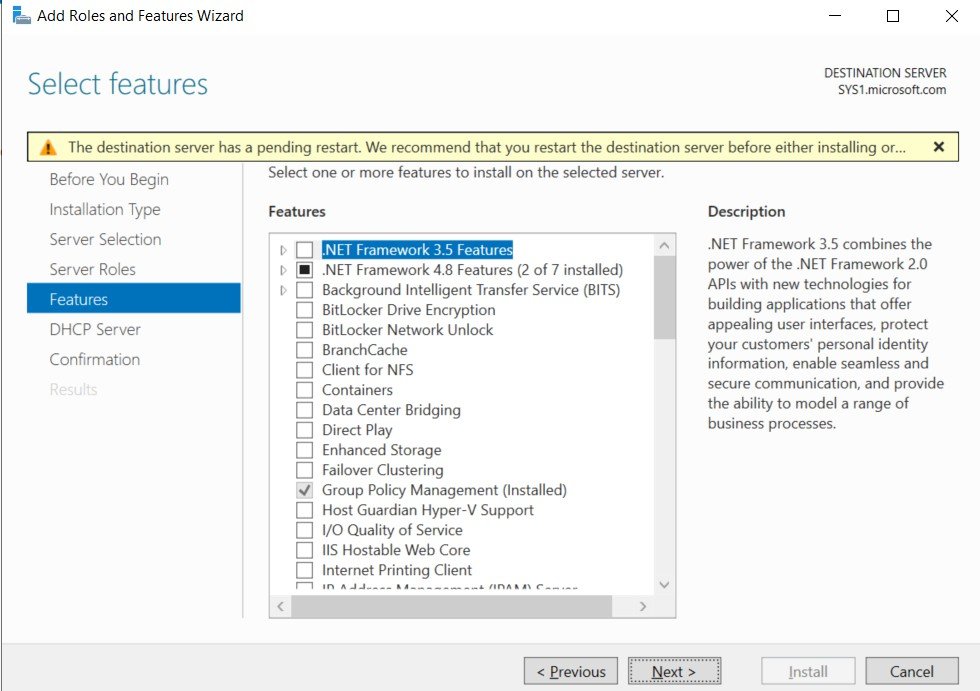
Step 7
In select features, click Next.
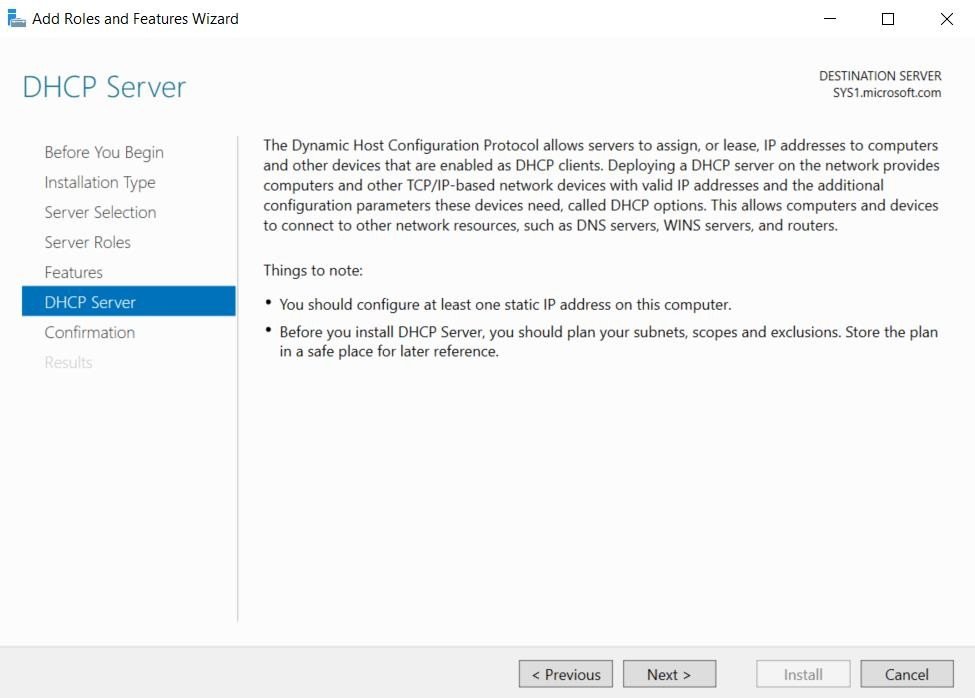
Step 8
Click Next.
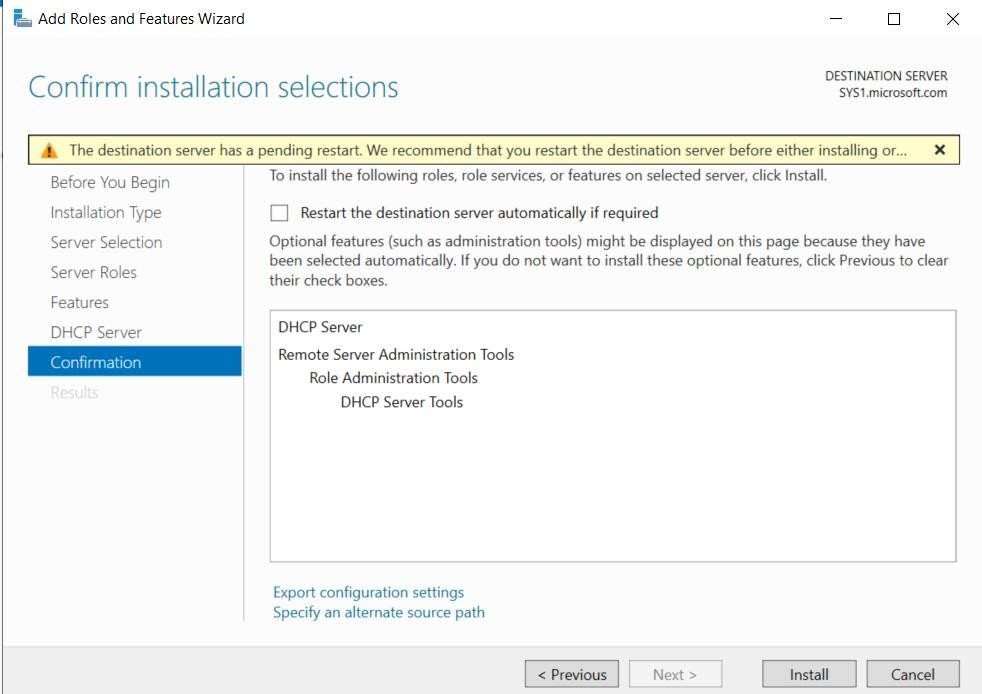
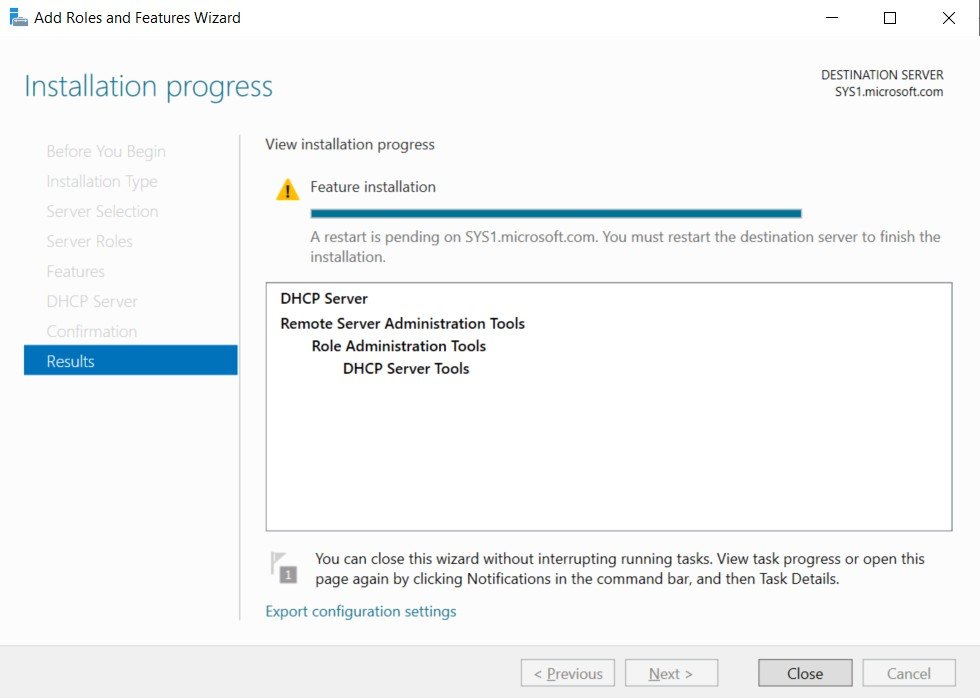
Step 9
Check Restart the destination server automatically if required and click Install.
Step 10
Select Complete DHCP configuration.
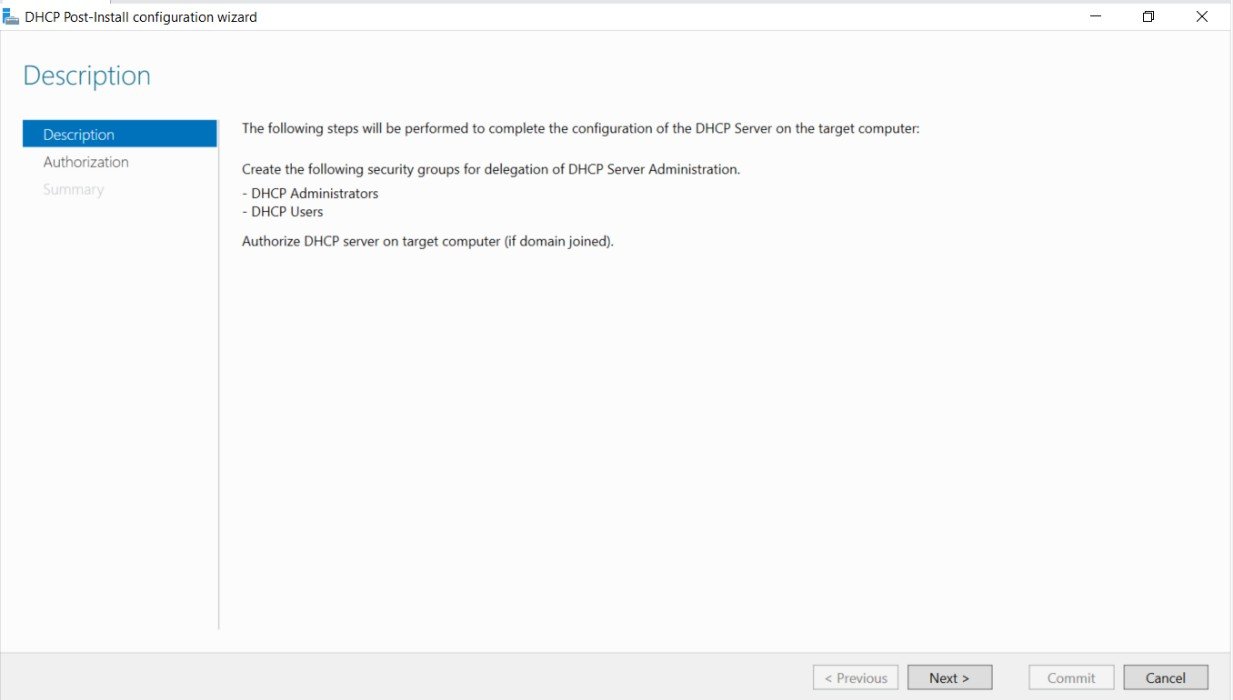
Step 11
In DHCP Post-install configuration wizard, click Next.
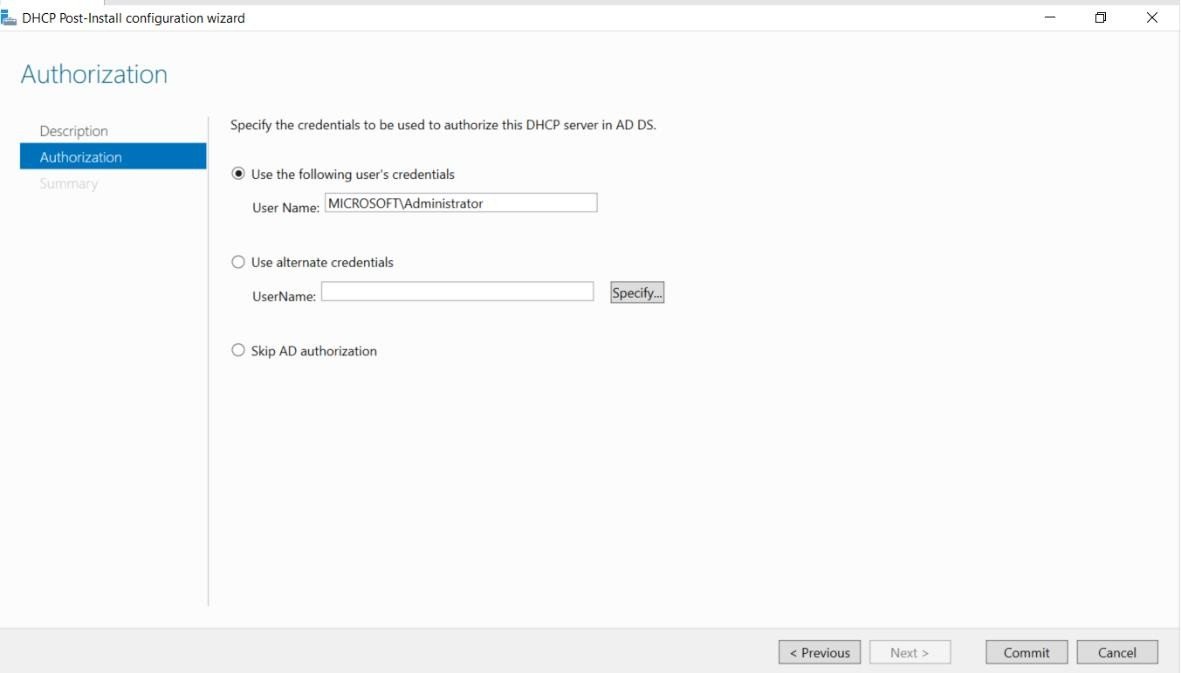
Step 12
Click Commit to Authorize the DHCP Server.
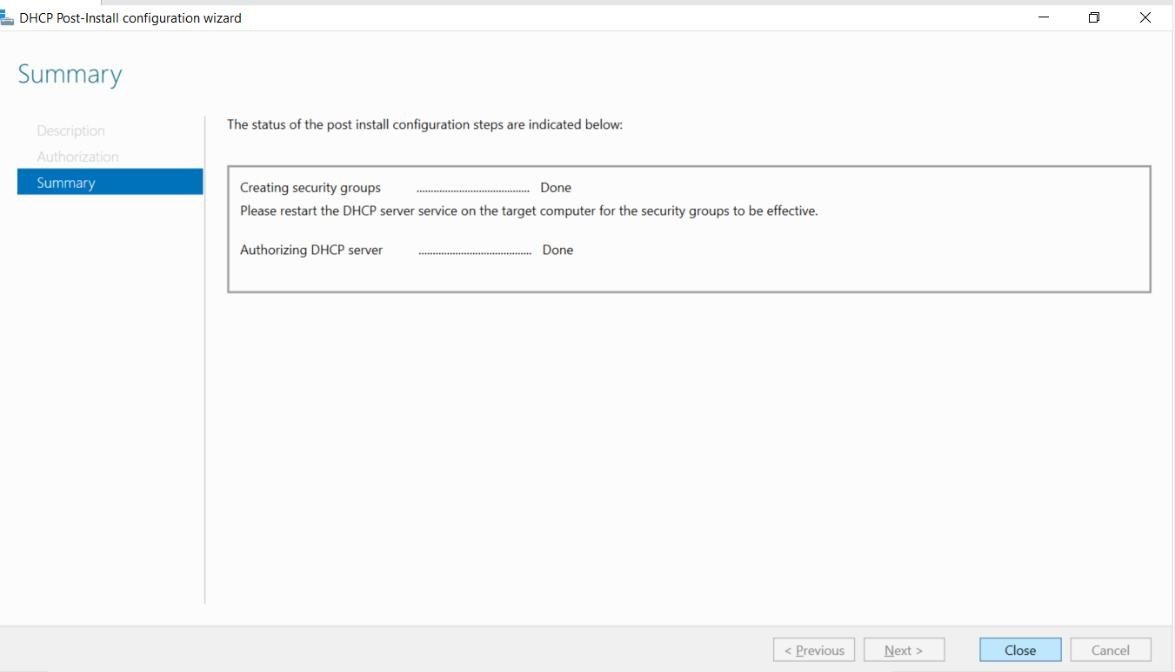
Step 13
Click Close to Complete the Authorization of DHCP Server. Creating a scope
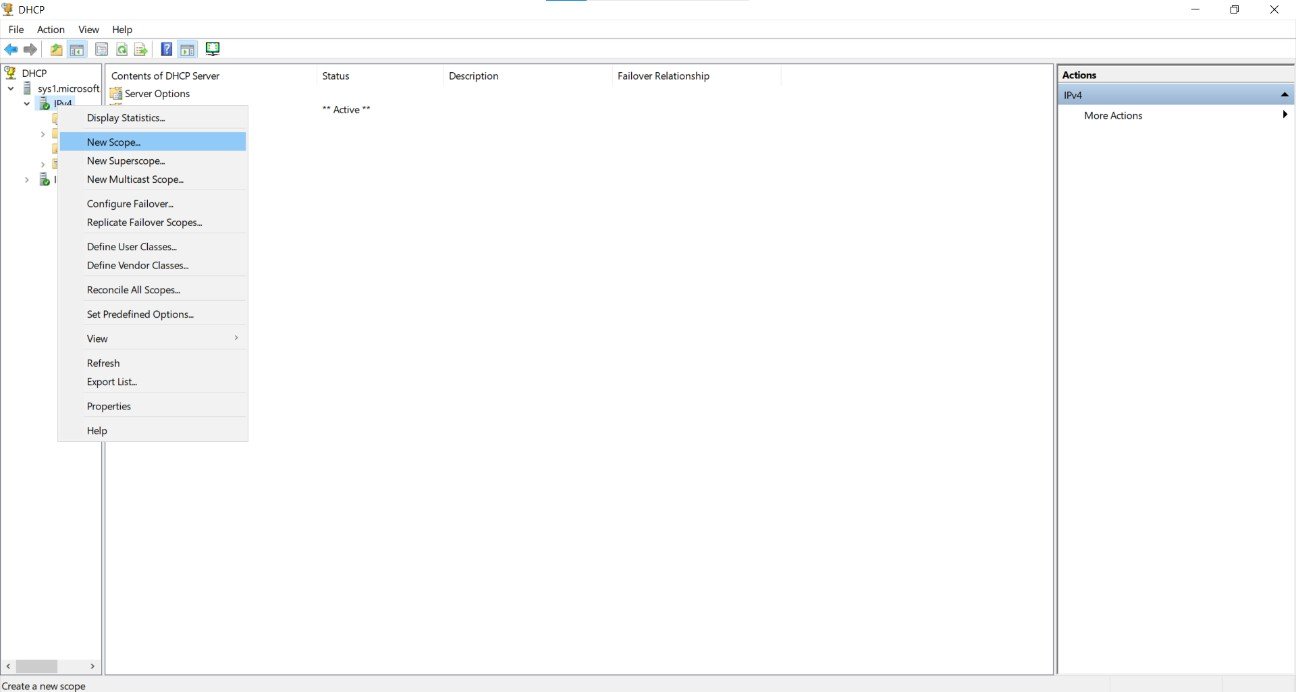
Step 1
Go to Start, select DHCP.
Step 2
Expand the System name =>right click IPv4 =» select New Scope.
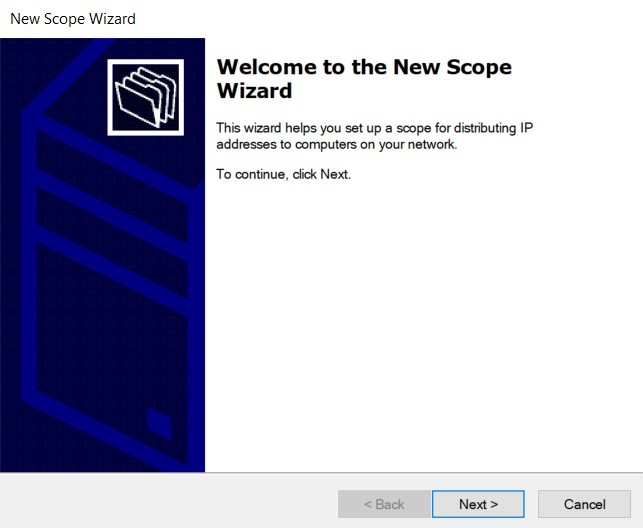
Step 3
The New Scope wizard starts, click Next.
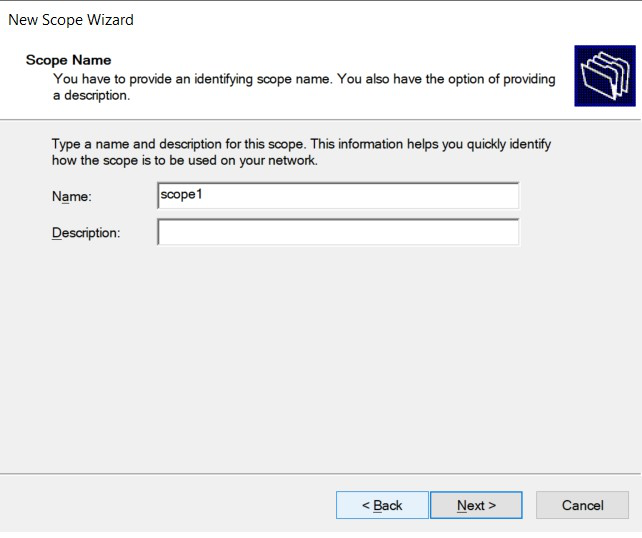
Step 4
Enter Name and a Description for the scope and click Next.
Step 5
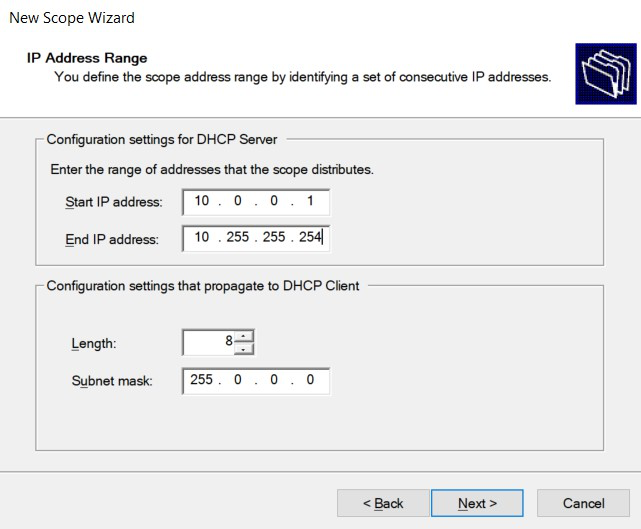
Enter the IP Address Range to be leased to clients, click Next. Note: Mention the scope in the same network of DHCP server
Step 6
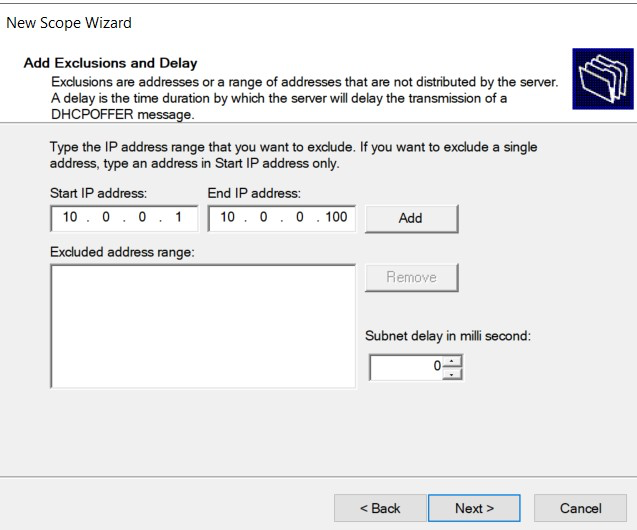
To exclude IP addresses, enter the Start and end IP address, click Add. Click Next.
Step 7
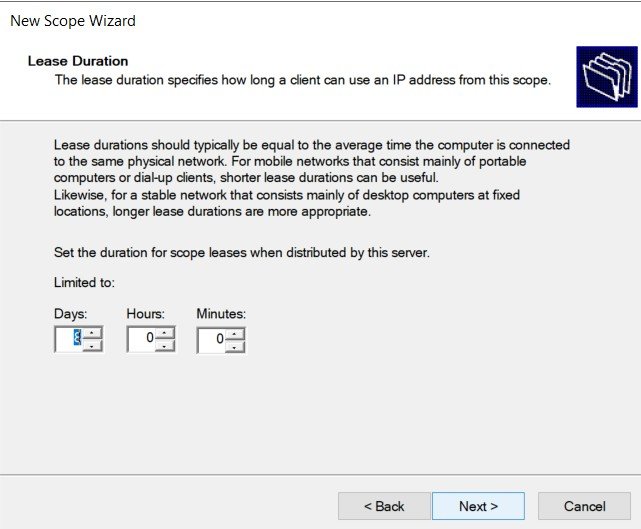
In the Lease Duration screen, you can Increase or Decrease the value, click Next.
Step 8
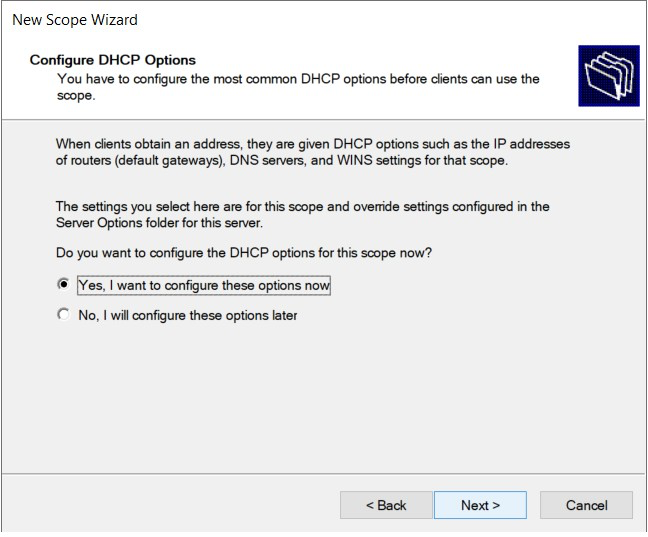
In the Configure DHCP Options screen, choose Yes, to configure DHCP options for this scope (such as routers, DNS, and WINS settings) now. Click Next.
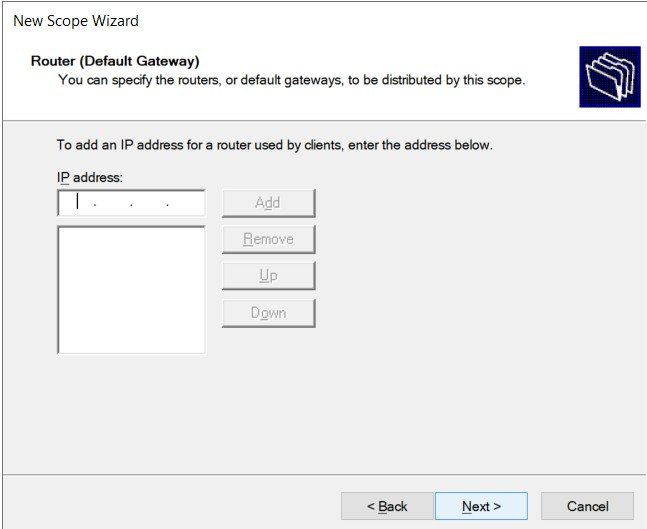
Step 9
In the Router (Default Gateway) screen, enter the IP address of the router that will function as the default gateway for this scope clients and click Add. Or, if you don’t have a Router in your network, just click Next.
Step 10
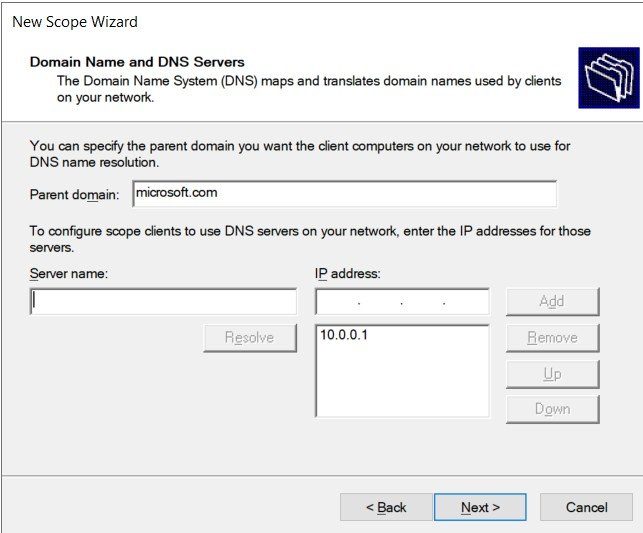
In the Domain Na Domain & IP address of the DNS server, click Add => click Next.
Step 11
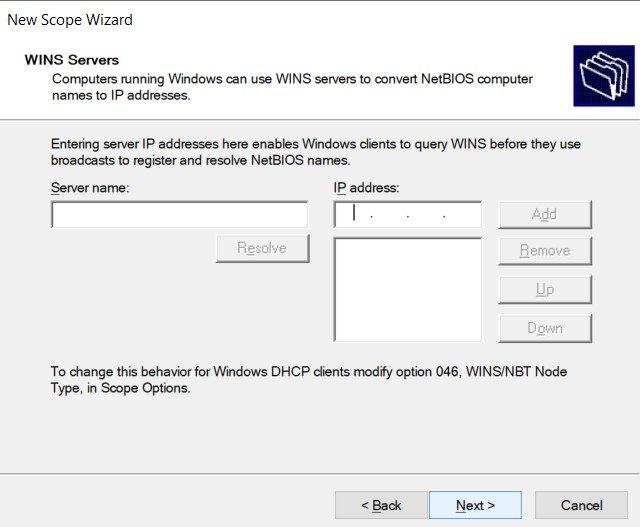
In the WINS Servers screen enter the IP address of the WINS server, click Add click Next, if you don’t have a WINS server on your network, just click Next.
Step 12
In the Activate Scope screen, select YES and click Next.

Step 13
Click Finish to complete the creation of Scope.
Verification
- In DHCP Client
- 1. Right click network Icon à Select properties à click View Status and select properties
- à Select Internet protocol Version (TCP/IPv4) Properties and select Obtain an IP
- Address automatically and Obtain an DNS Server Address Automatically àOK
- 2. Open the Command Prompt à and type Ipconfig /release
- 3. Then type ipconfig/renew
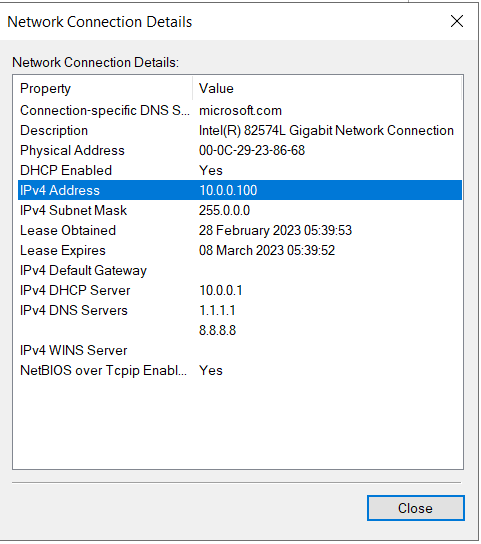
- 4. After that Right click on network Icon à Select properties à click View Status and click
- Details.
- 5. Verify the IP Address leased by the DHCP Server along with the lease duration and
- DHCP Server and DNS Server details.