Prerequisites
- Before working on this lab, You must have
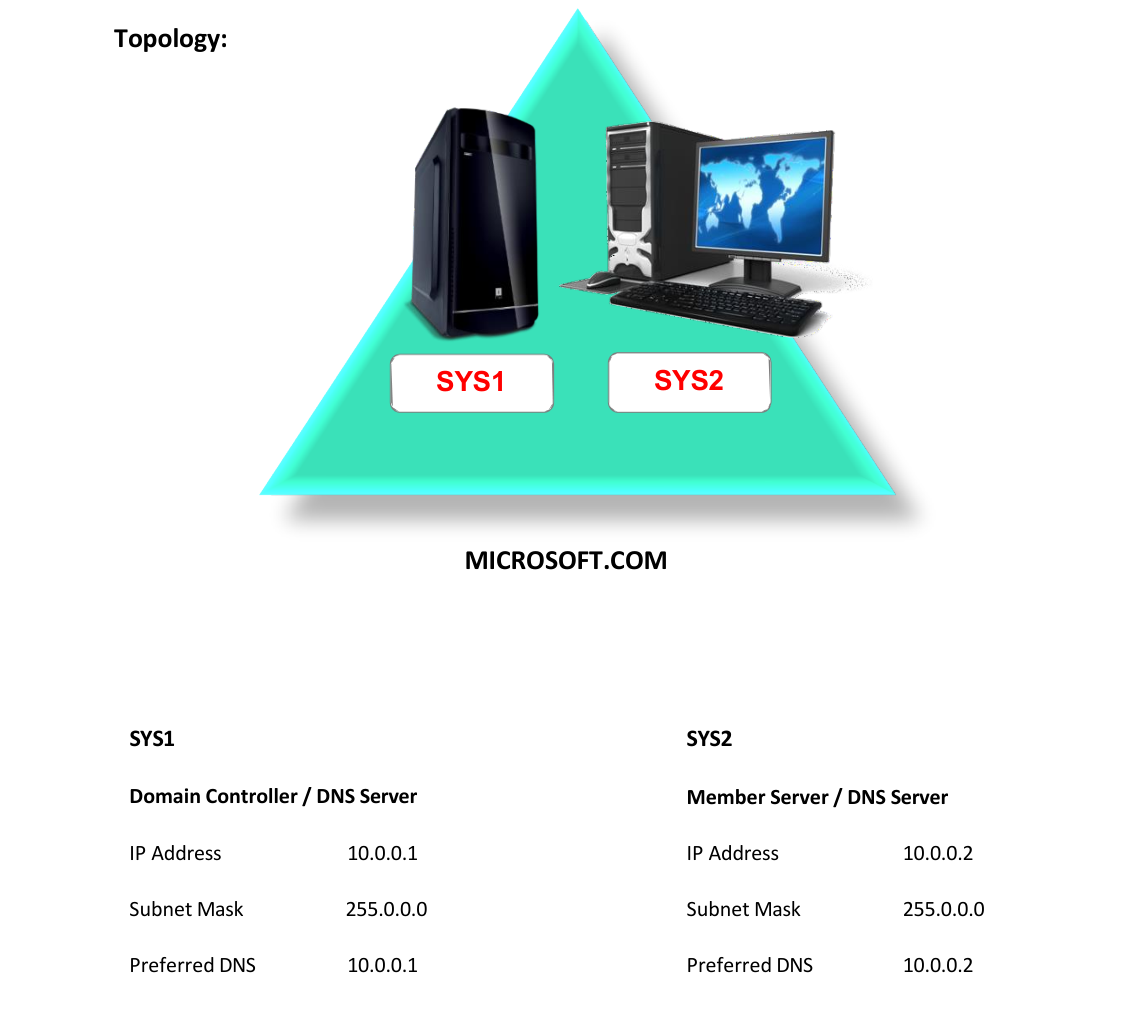
- A computer running windows server 2022 Domain Controller.
- A Member Server running windows server 2022.
- Installing DNS Service
Network Topology
Step-by-Step Instructions
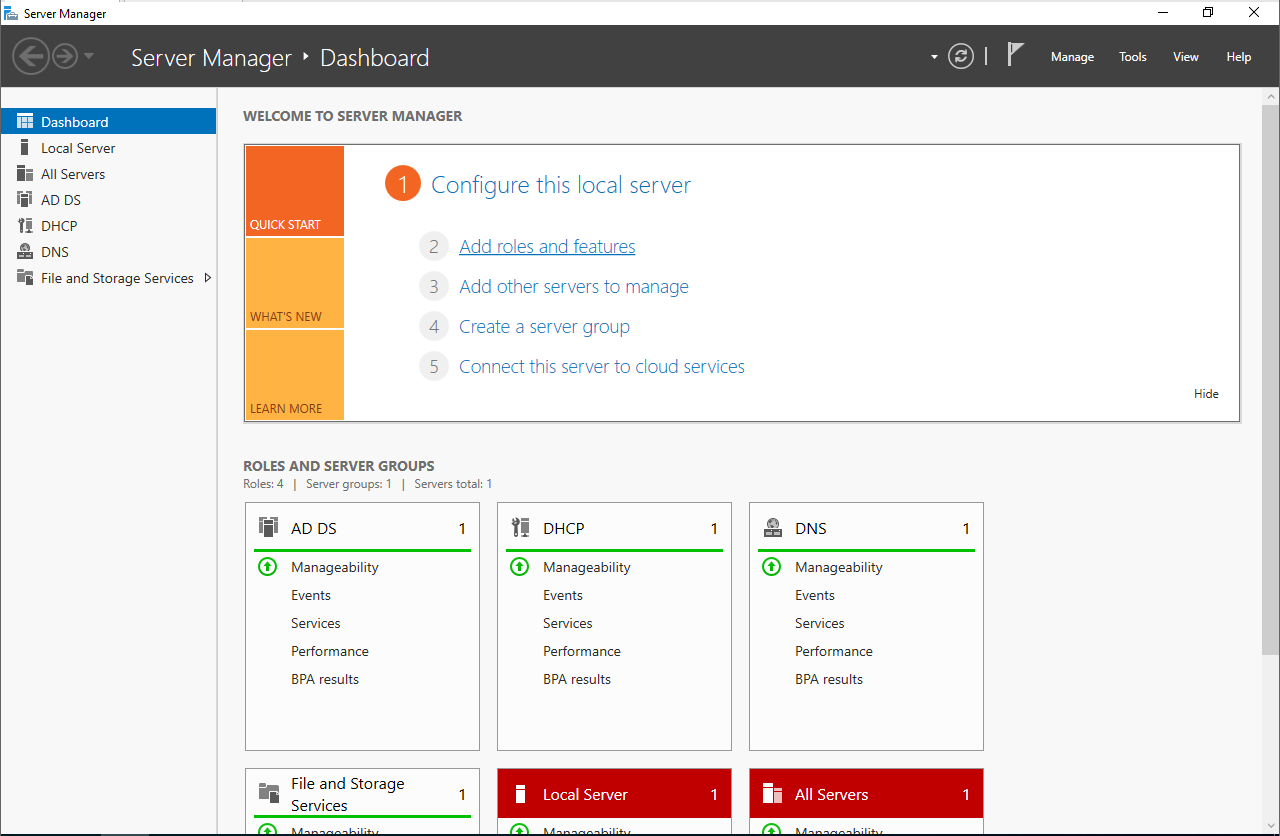
Step 1
Select Click Server Manager. DNS Server
Step 2
In the Server Manager Console, Select Add roles and features
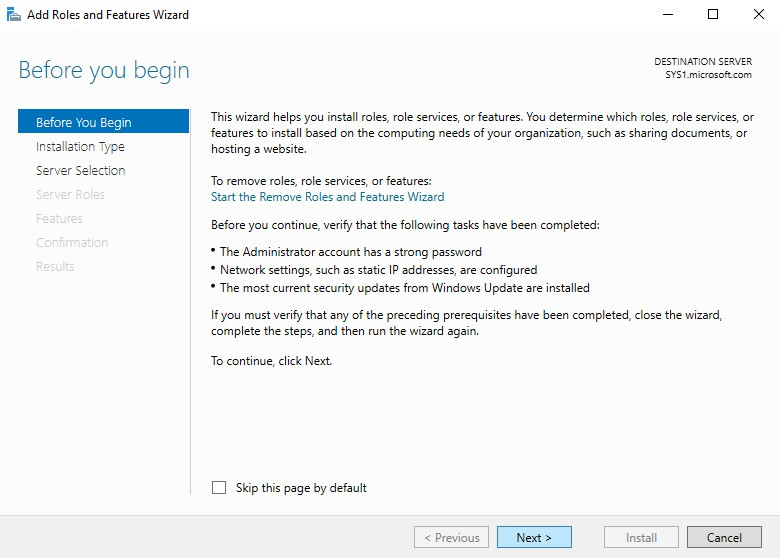
Step 3
In Before you begin page, click Next.
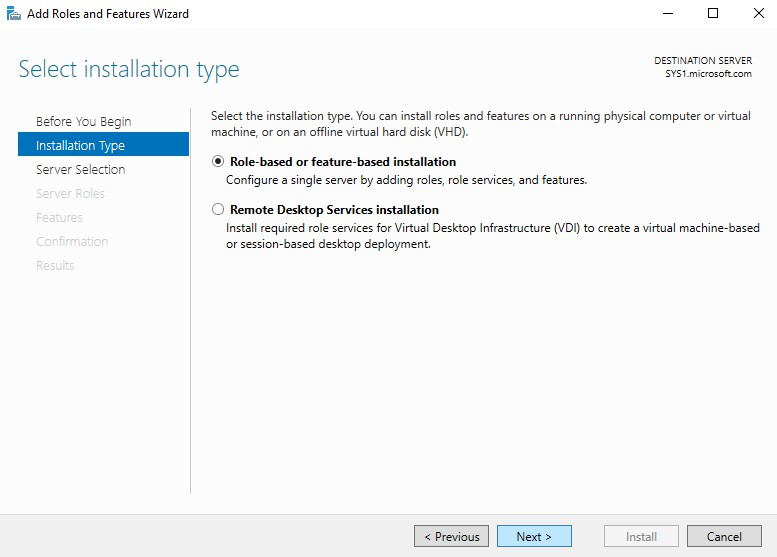
Step 4
Select Role-based or feature-based installation and click Next.
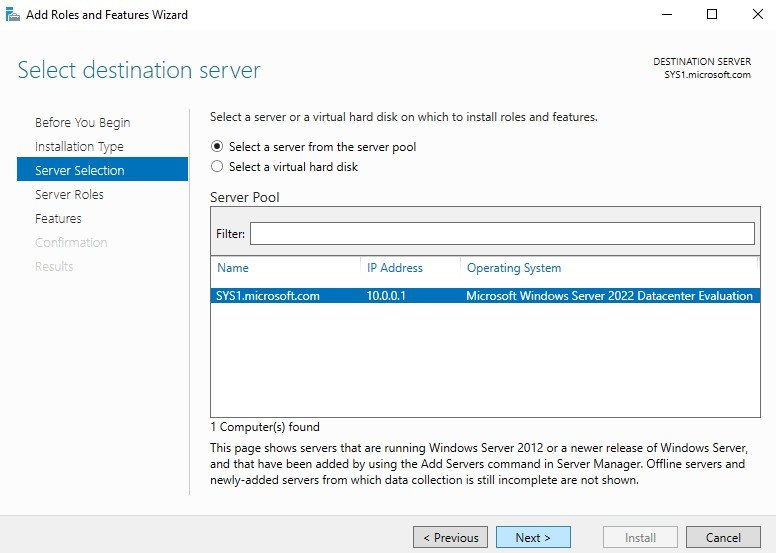
Step 5
Select a server (sys1.Microsoft.com) from the server pool and click Next.
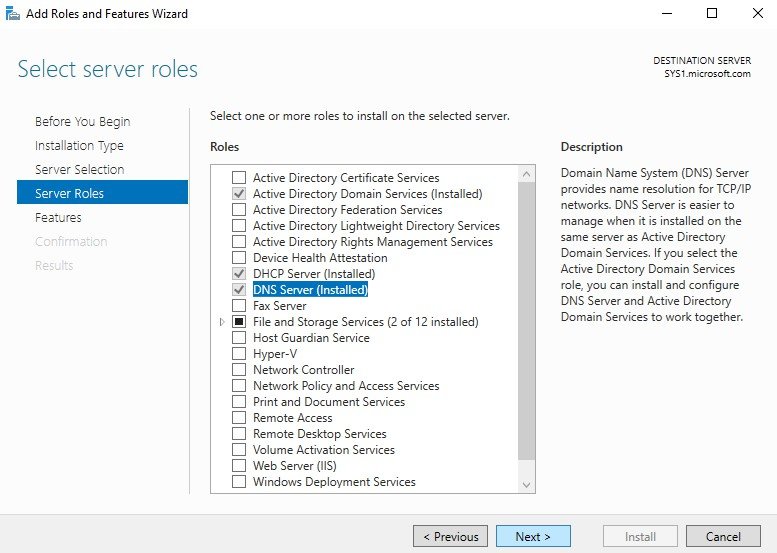
Step 6
Check box DNS Server, click Next à Next à Install à Finish. Note: On Domain Controller, by default DNS Server Role will be installed. On Member Server we have to install the DNS Server Role Manually using the same process Creating Standard Primary - Forward Lookup Zone
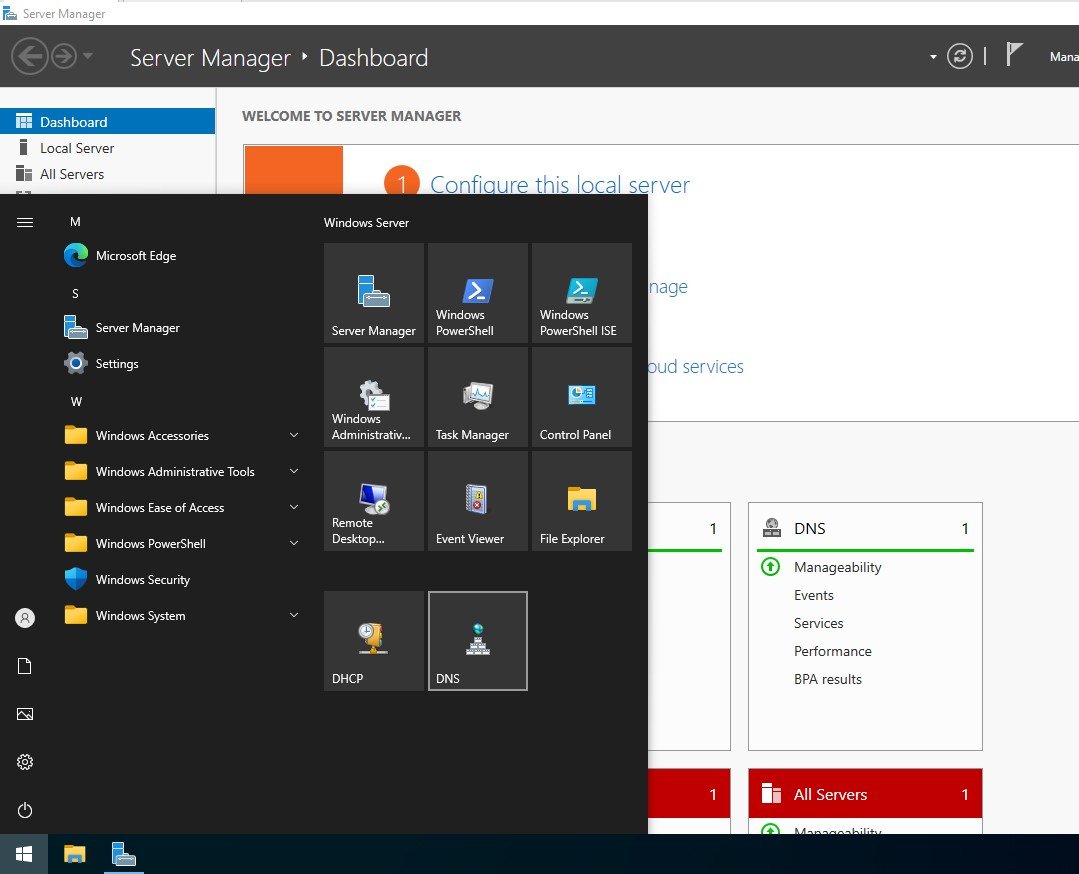
Step 1
Go to Start, select DNS.
Step 2
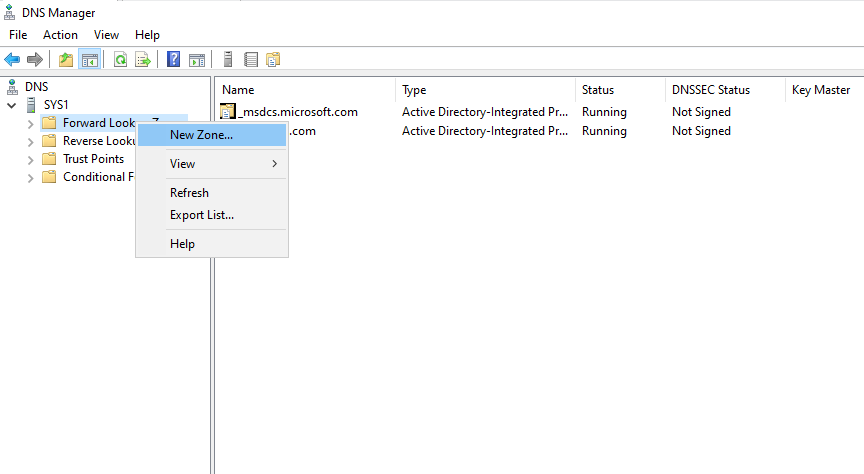
In the DNS dialog box, Expand the DNS à Server name in the left pane, right click the Forward Lookup Zones à select New Zone
Step 3
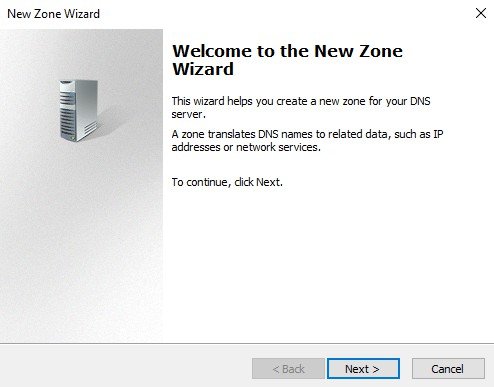
In the welcome to new zone wizard click Next
Step 4
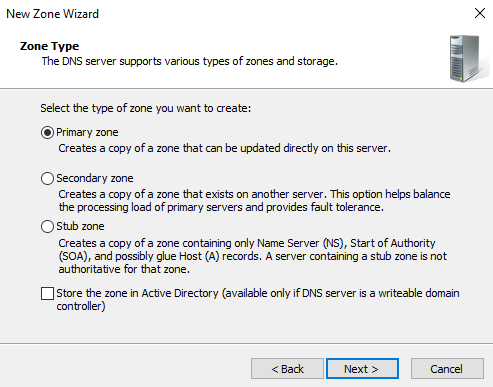
Select “Primary Zone” and Remove the check box for "Store the zone in Active Directory", click Next.
Step 5
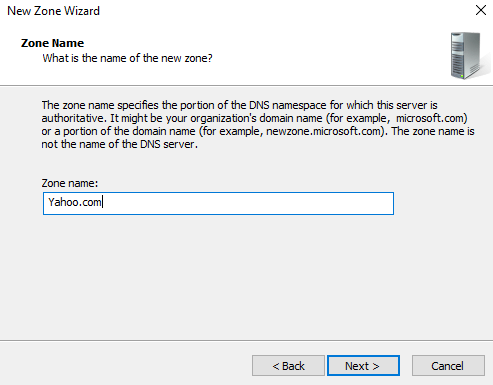
In the Zone Name screen, type in the name of the zone you are creating. This name is usually the FQDN of the DNS domain that the zone will contain, such as YAHOO.COM à click Next.
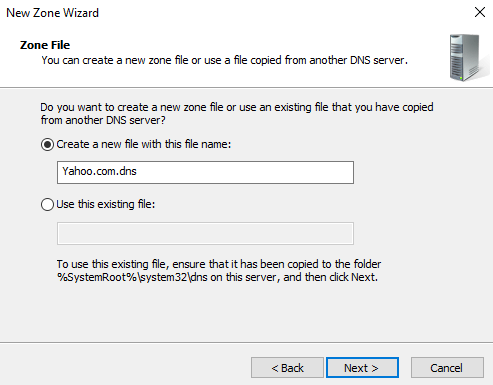
Step 6
The Zone File screen appears. In this screen, you can either create a new zone file for the new zone, or configure the new zone to use an existing file. Click Next.
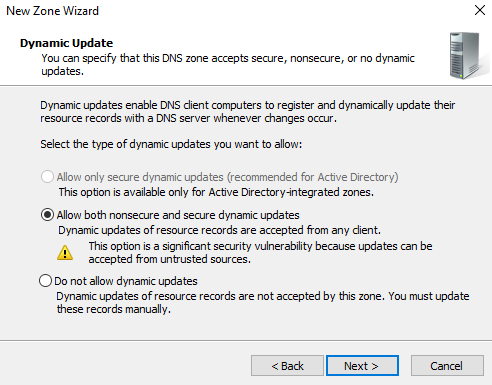
Step 7
In dynamic Update Select "Allow both non-secure and secure dynamic update" à click Next.
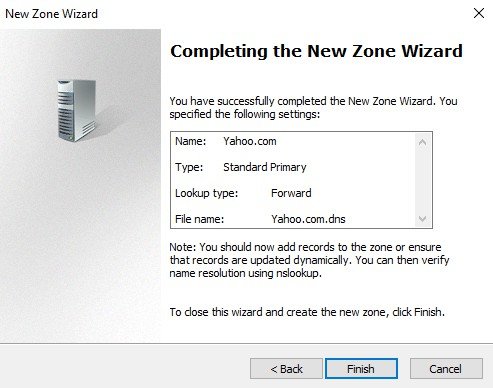
Step 8
The Completing the New Zone Wizard screen appears. Click Finish.
Step 9
In the DNS Console, the new zone you created appears in the right pane. Creating Host Records for the standard primary Zone
Step 1
Go to Start, select DNS.
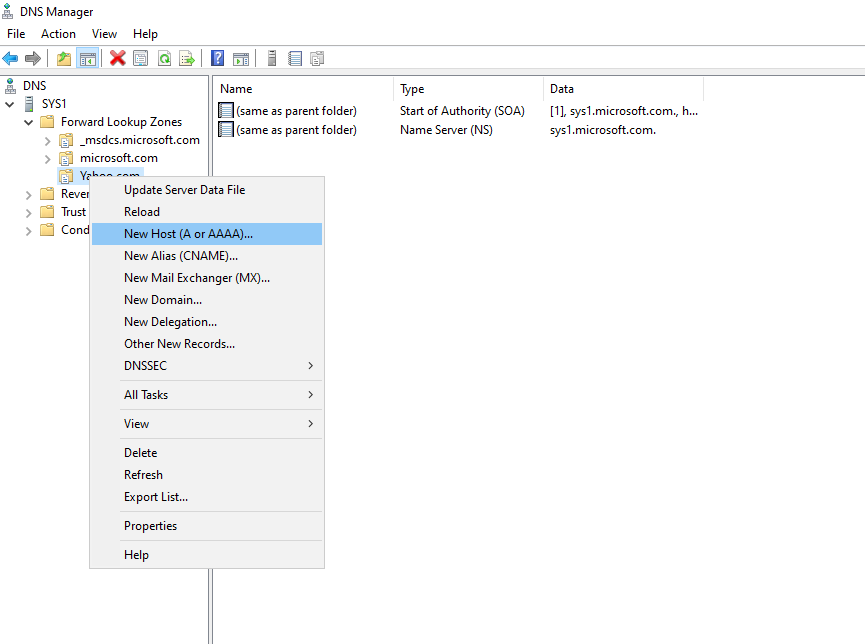
Step 2
Right click the zone and select New Host.
Step 3
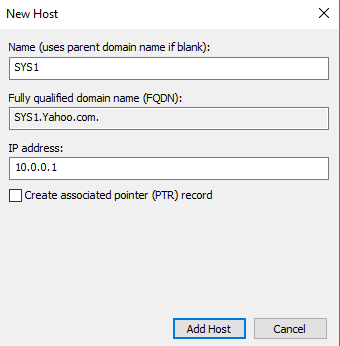
Enter the Host name for which you are configuring the record Ex: SYS1, enter the corresponding IP address of the host à click Add Host à OK à Done. Creating an Alias record for the host record
Step 1
Go to Start, select DNS.
Step 2
Right click the zone and select New Alias.
Step 3
Enter the name in the ‘Alias Name’ dialog box Ex: www
Step 4
Click Browse à Double click system name à double click Forward Lookup Zone à double click the zone name à select the host name à click OK à OK

Verification
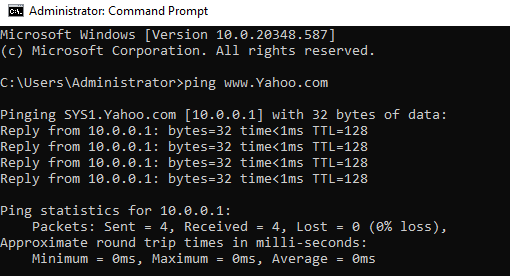
- 1. Open Command Prompt à type ping FQDN (Fully Qualified Domain Name)
- Ex: Ping SYS1.YAHOO.COM (or) Ping WWW.YAHOO.COM
- 2. Name should be resolved into IP Address.
- Creating Standard Primary - Reverse Lookup Zone
- 1. Go to Start, select DNS.
- 2. In the DNS dialog box, expand the DNS server's name in the left pane=> right click the
- Reverse Lookup Zones à Select New Zone.
- 3. Click Next.
- 4. Select “Primary Zone” and Remove the check box for "Store the zone in Active
- Directory", click Next.
- 5. Check IPv4 Reverse Lookup Zone
- 6. In the network ID give the first three octets Ex: 10.0.0 à Next
- 7. Click Next
- 8. In dynamic Update Select "Allow both non-secure and secure dynamic update" à
- click Next finish
- Creating pointer record
- 1. Go to Start, select DNS.
- 2. Expand Reverse lookup zone and Right click the zone à select New Pointer
- 3. In the pointer record give the fourth octet à click browse à double click server name
- (SYS1) à double click Forward Lookup Zone à double click the zone
- name(Yahoo.com) à double click the host name (SYS1) à OK
- 1. Open the command prompt and type nslookup 10.0.0.1