Prerequisites
- Before working on this lab, You must have
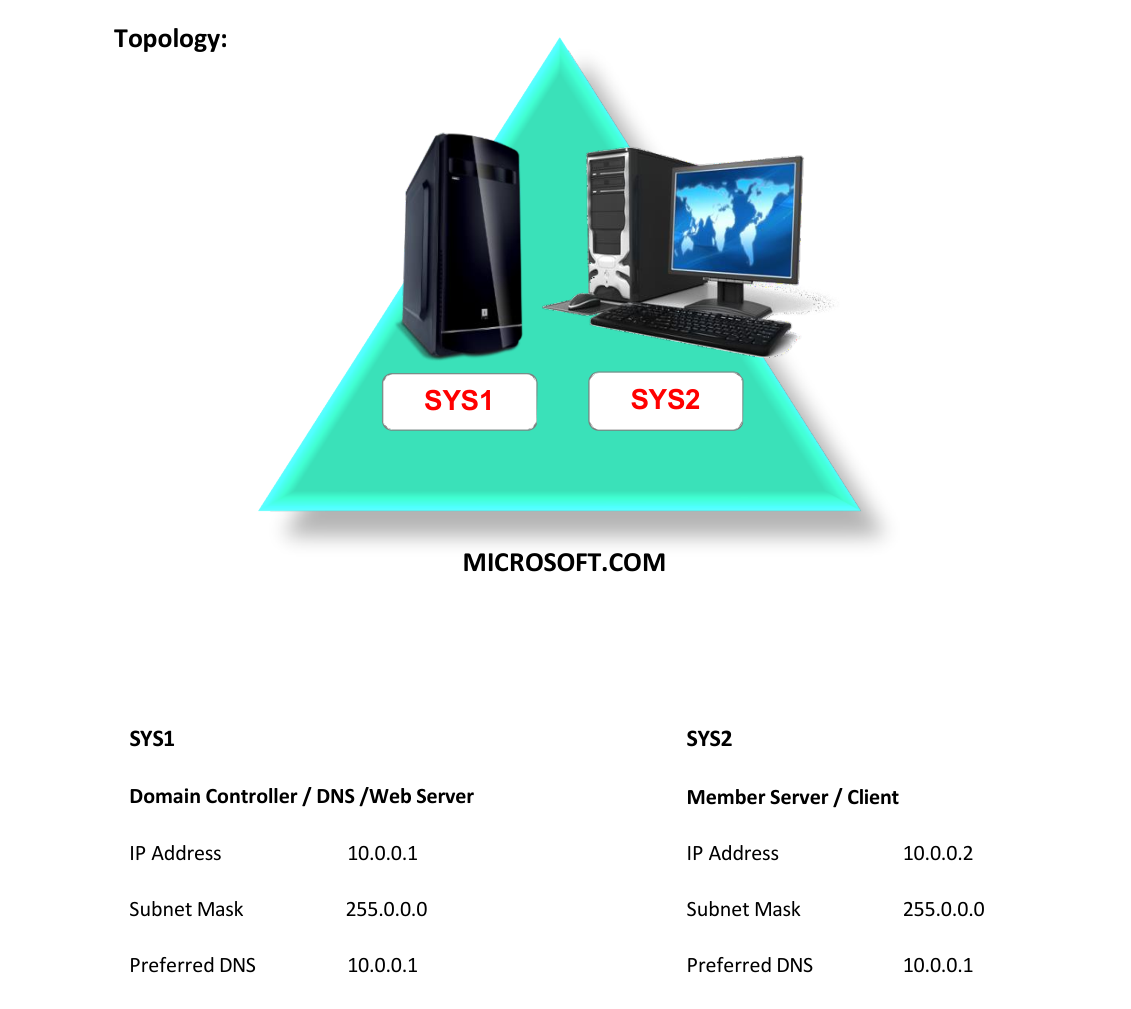
- A computer running windows server 2022 Domain Controller.
- A Member Server running windows server 2022 or Client Running Windows 10.
- Installing Internet Information Services - Web & FTP Server
Network Topology
Step-by-Step Instructions
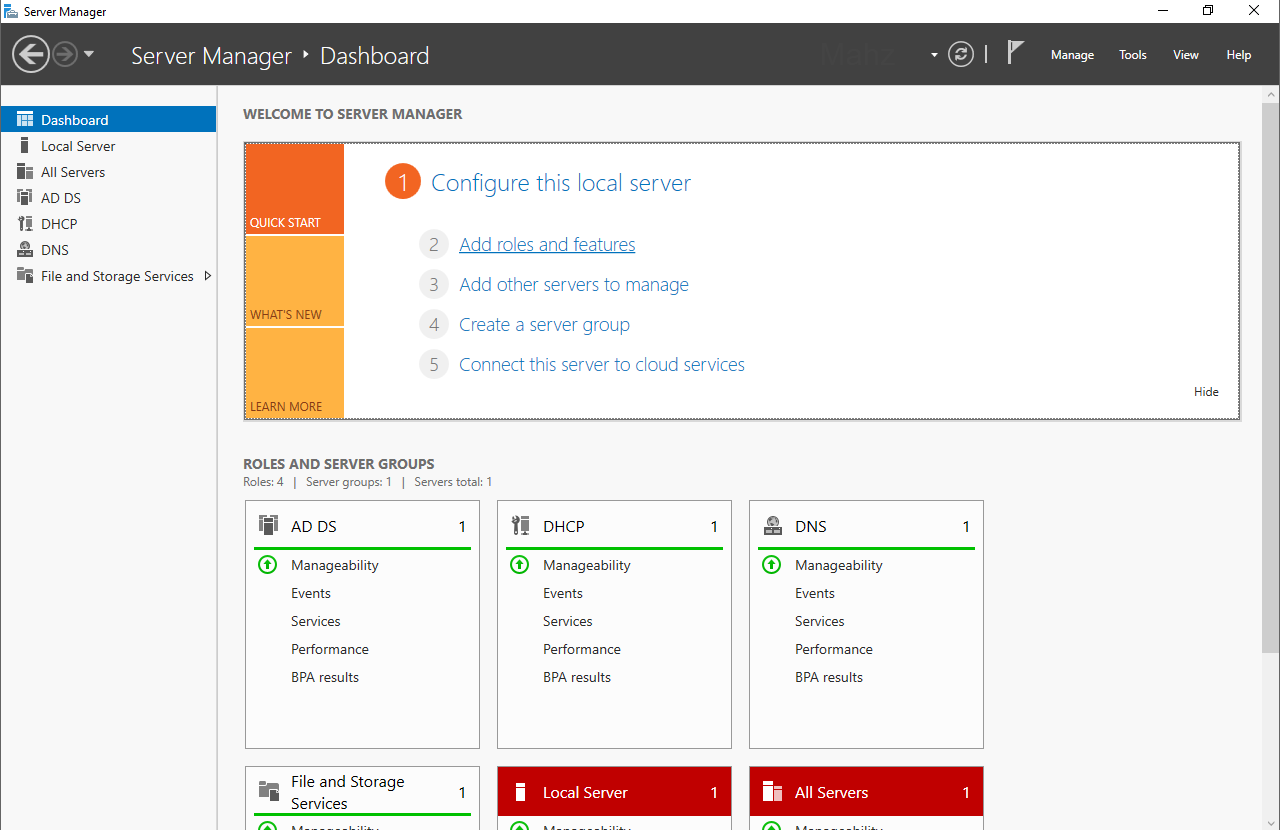
Step 1
Click Server Manager. Web Server
Step 2
In Server Manager Dashboard à select Add Roles and features.
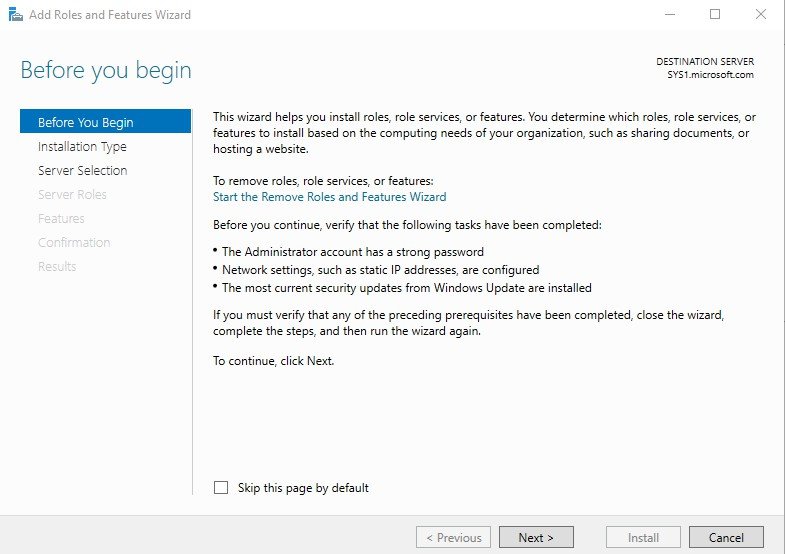
Step 3
In Before you begin page, click Next.
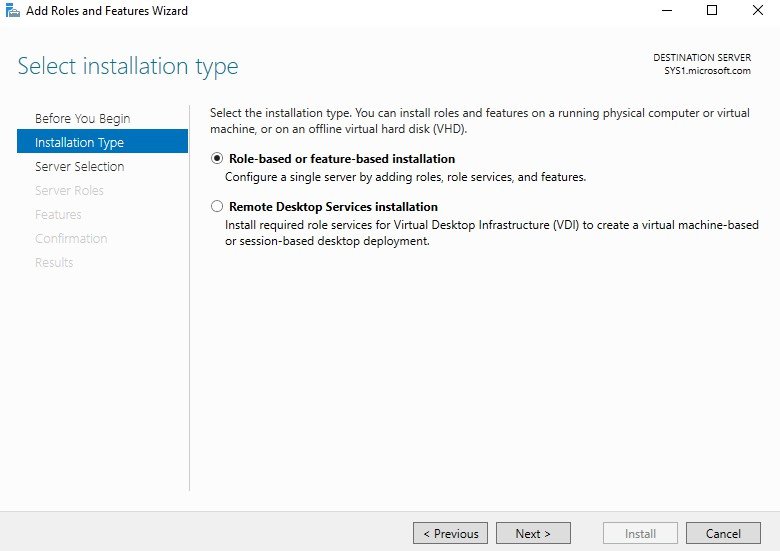
Step 4
Select Role-based or feature-based installation, click Next.
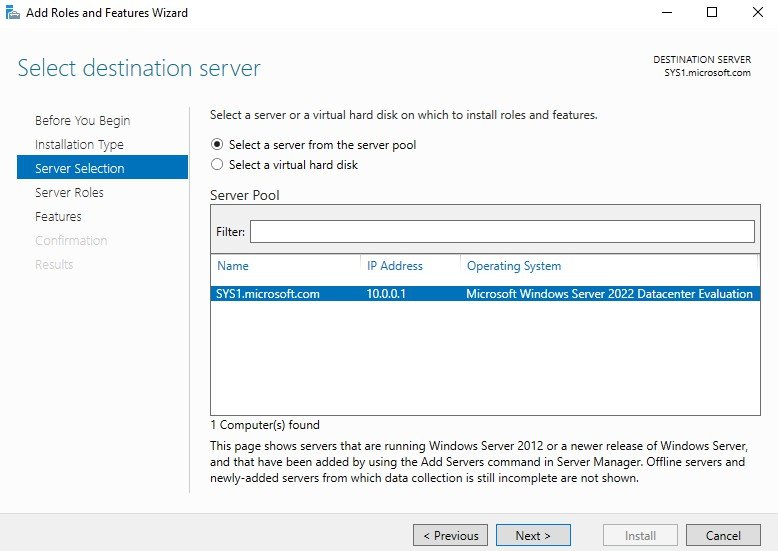
Step 5
Select a server (sys1.Microsoft.com) from the server pool and click Next.
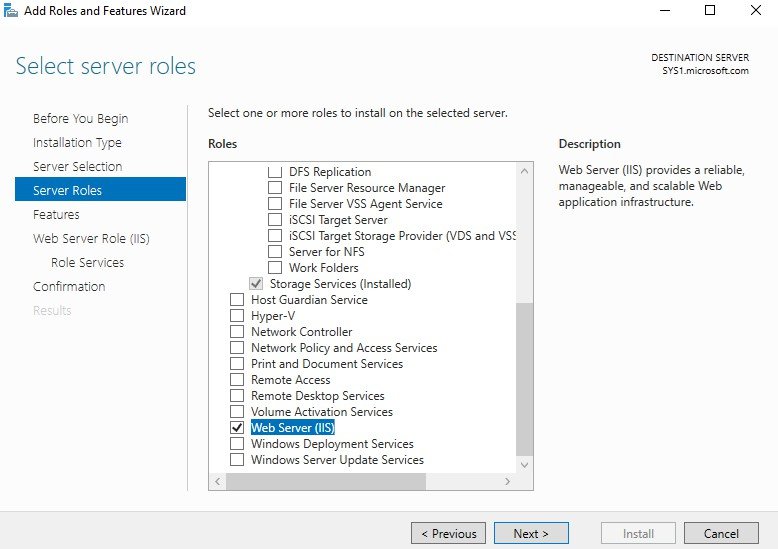
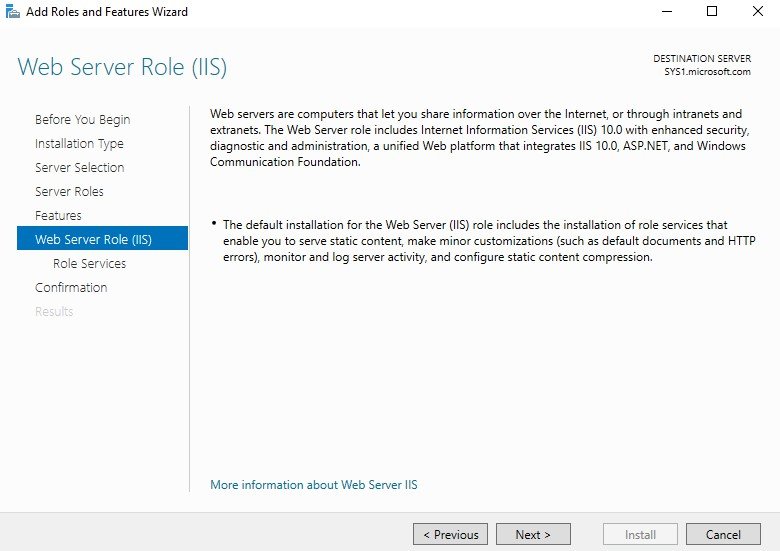
Step 6
In select server roles, check the box Web Server and click Next.
Step 7
In Add required features for Web Server (IIS), click Add Features.
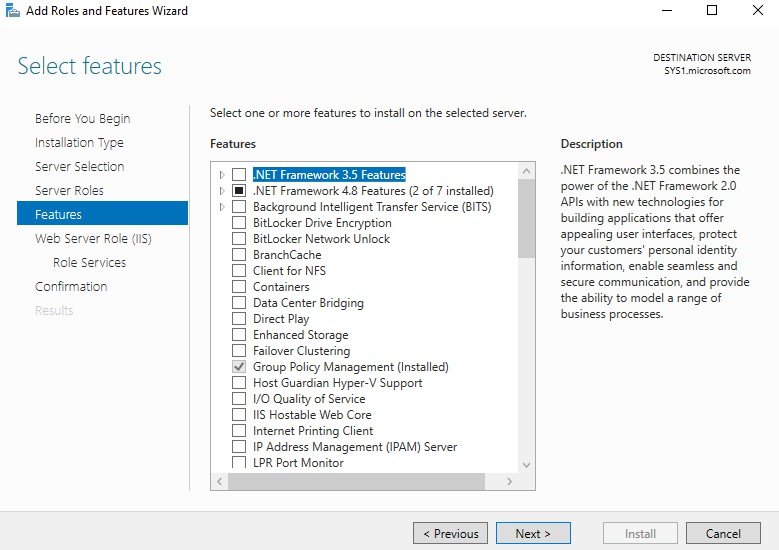
Step 8
In select features, click Next.
Step 9
Click Next.
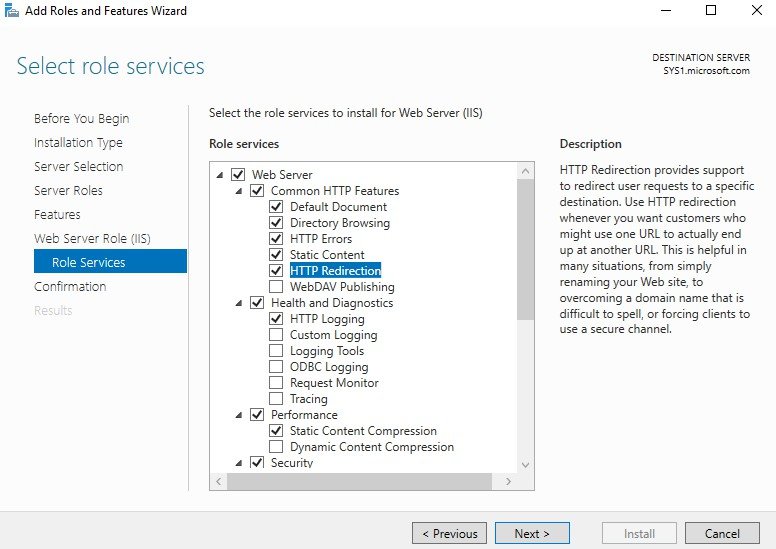
Step 10
Check the box HTTP Redirection, under Common HTTP Features.
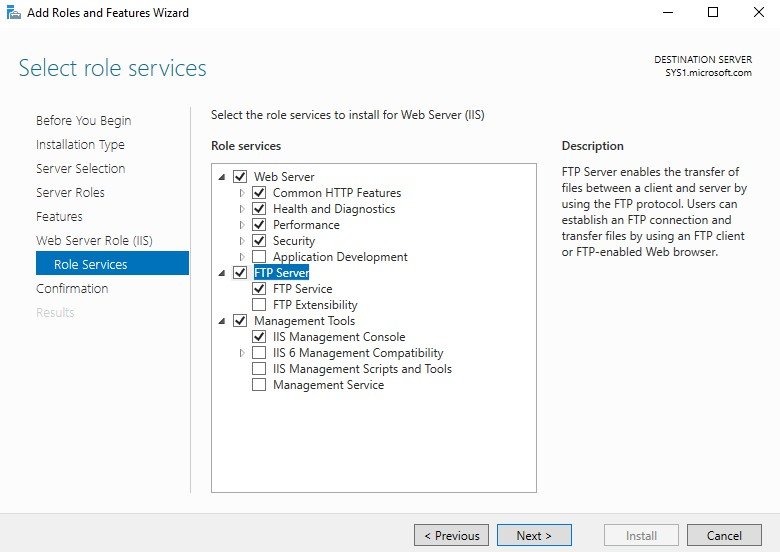
Step 11
Check the box FTP Service, under FTP Server.
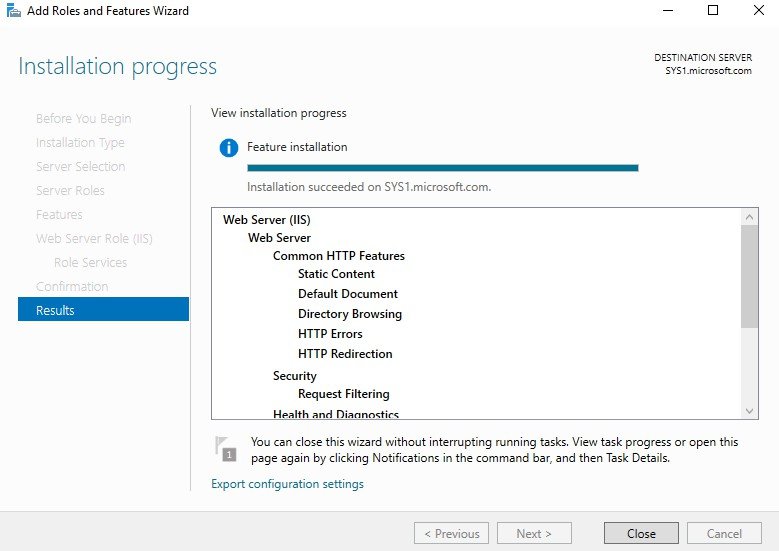
Step 12
Check Restart the destination server automatically if required and click Install.

Step 13
Select Complete DHCP configuration. Creating a Web Site
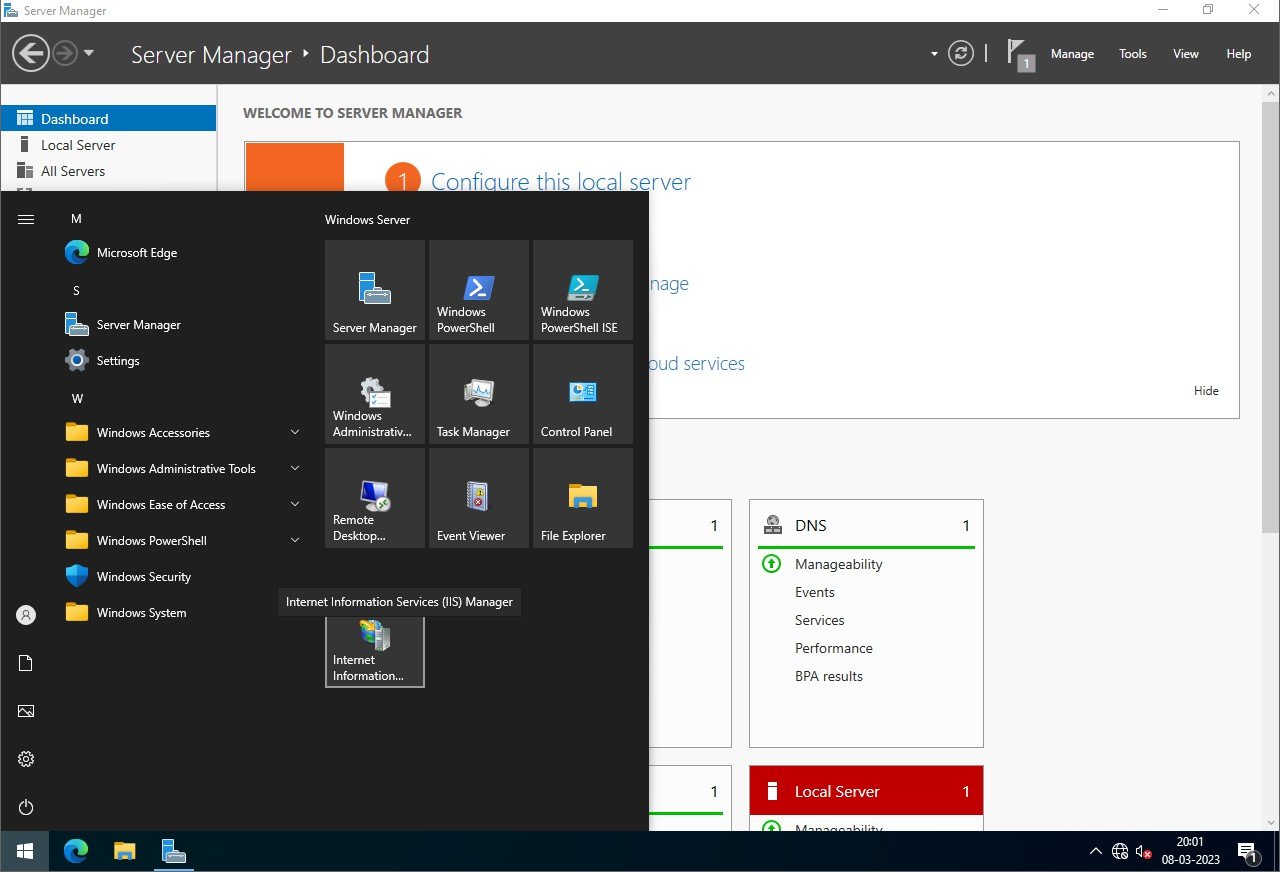
Step 1
Go to Start, select Internet Information Services Manager.
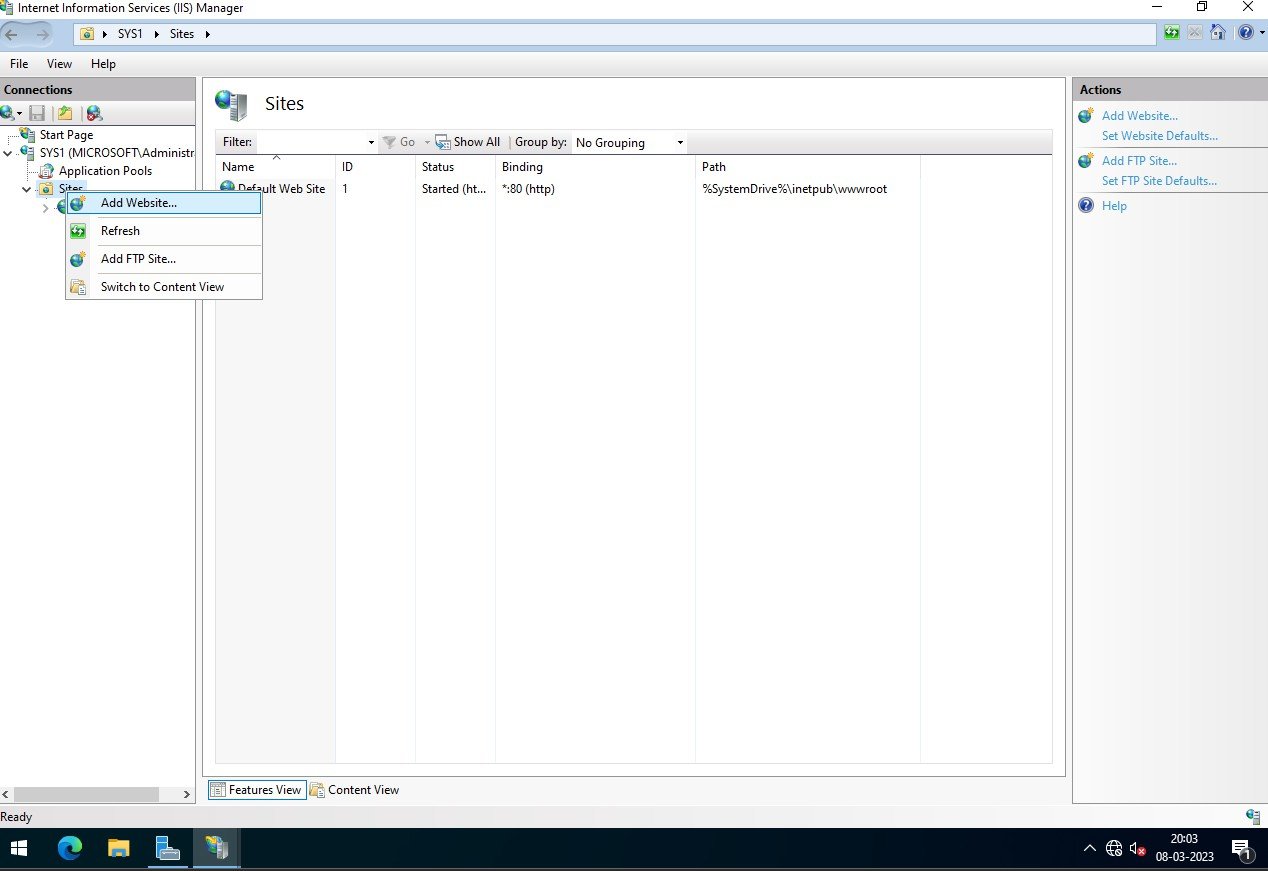
Step 2
In the left pane of the Internet Information Services, Expand the server à Right click on sites and select Add Web Site.
Step 3
Add Web Site wizard opens à In the Site name type a Name for the Website Ex:YAHOO.COM
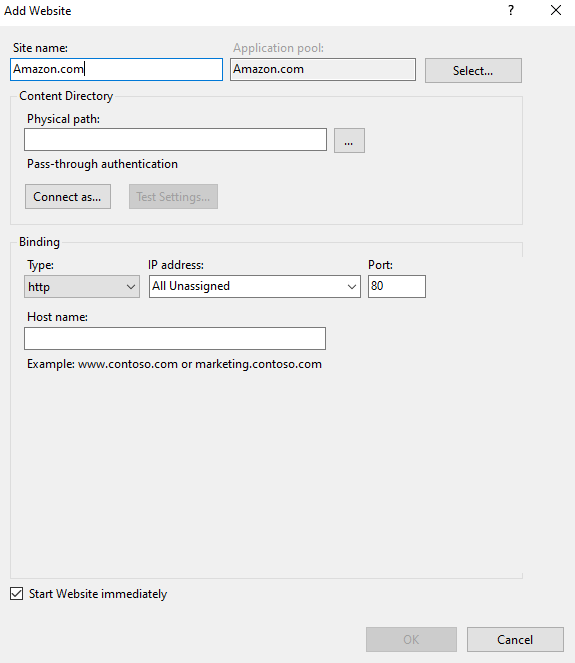
Step 4
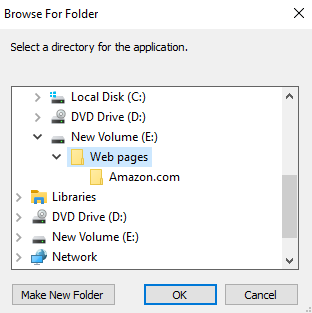
In Physical path, browse and select the location of Home Directory (webpage)
Step 5
Select one IP address (10.0.0.1) from the drop-down list.
Step 6
Specify the Host name Ex: WWW.YAHOO.COM & click OK.

Step 7
Web Site will be successfully added. Adding the Default Document for the website
Step 1
Open IIS à expand sites à select website à right click and select Explore.
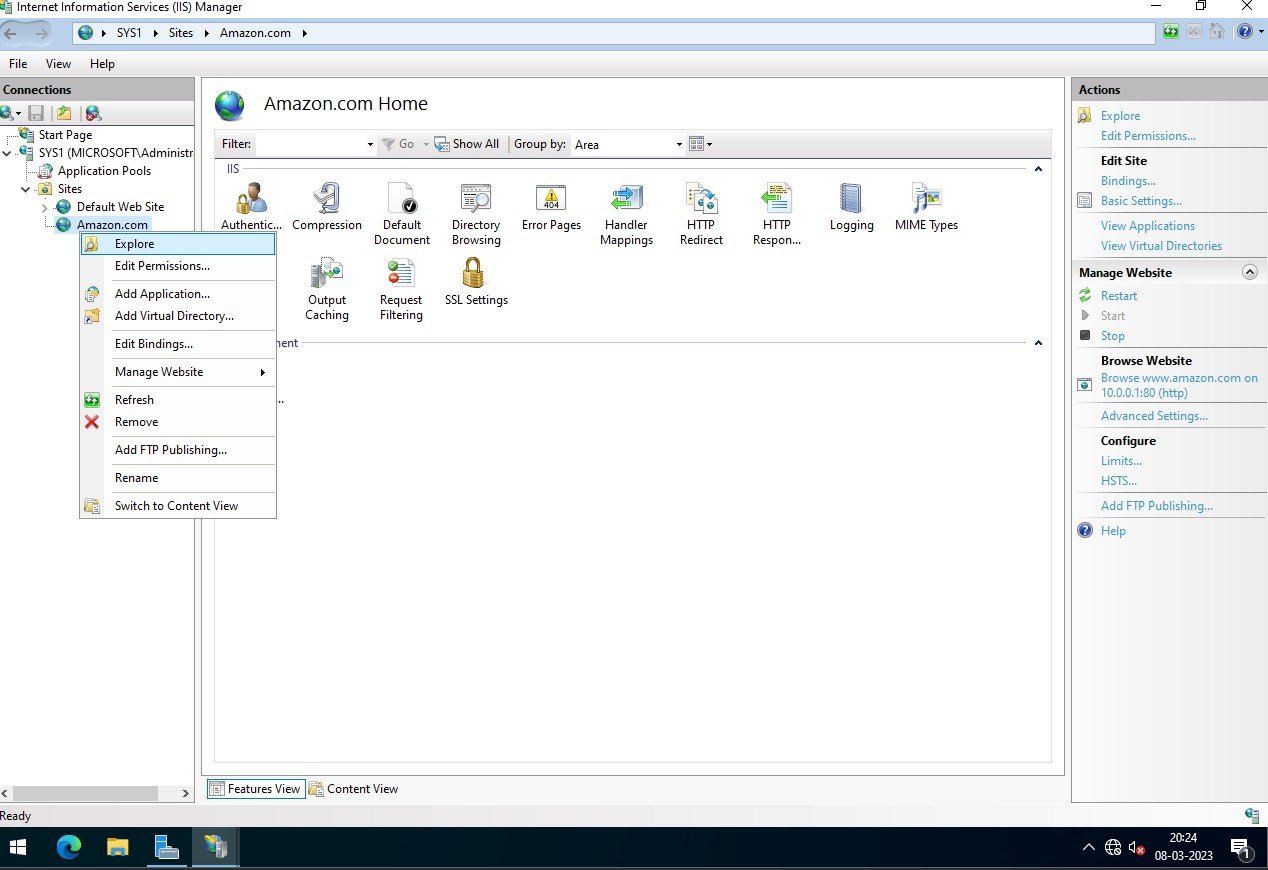
Step 2
Select the Webpage à Right click & select Rename à Copy the webpage name
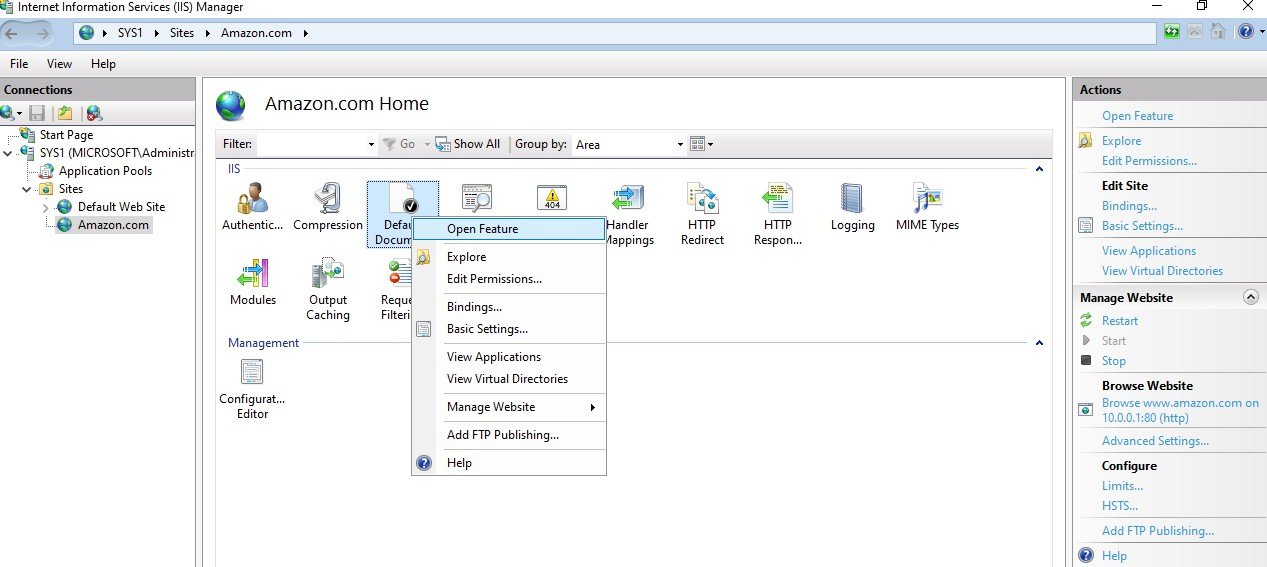
Step 3
In IIS à expand sites à select website à Open Default Document feature.
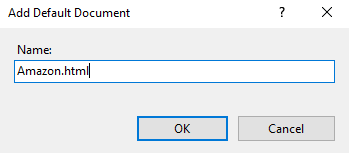
Step 4
Click Add, Mention (Paste) the html file name (with Extension of file) Ex:Yahoo!.htm à click OK. Enable Directory Browsing for the web site
Step 1
Open IIS à expand sites and select the website (YAHOO.COM)

Step 2
Open Directory Browsing Feature à click Enable. (on Actions pane) DNS Configuration for the Website
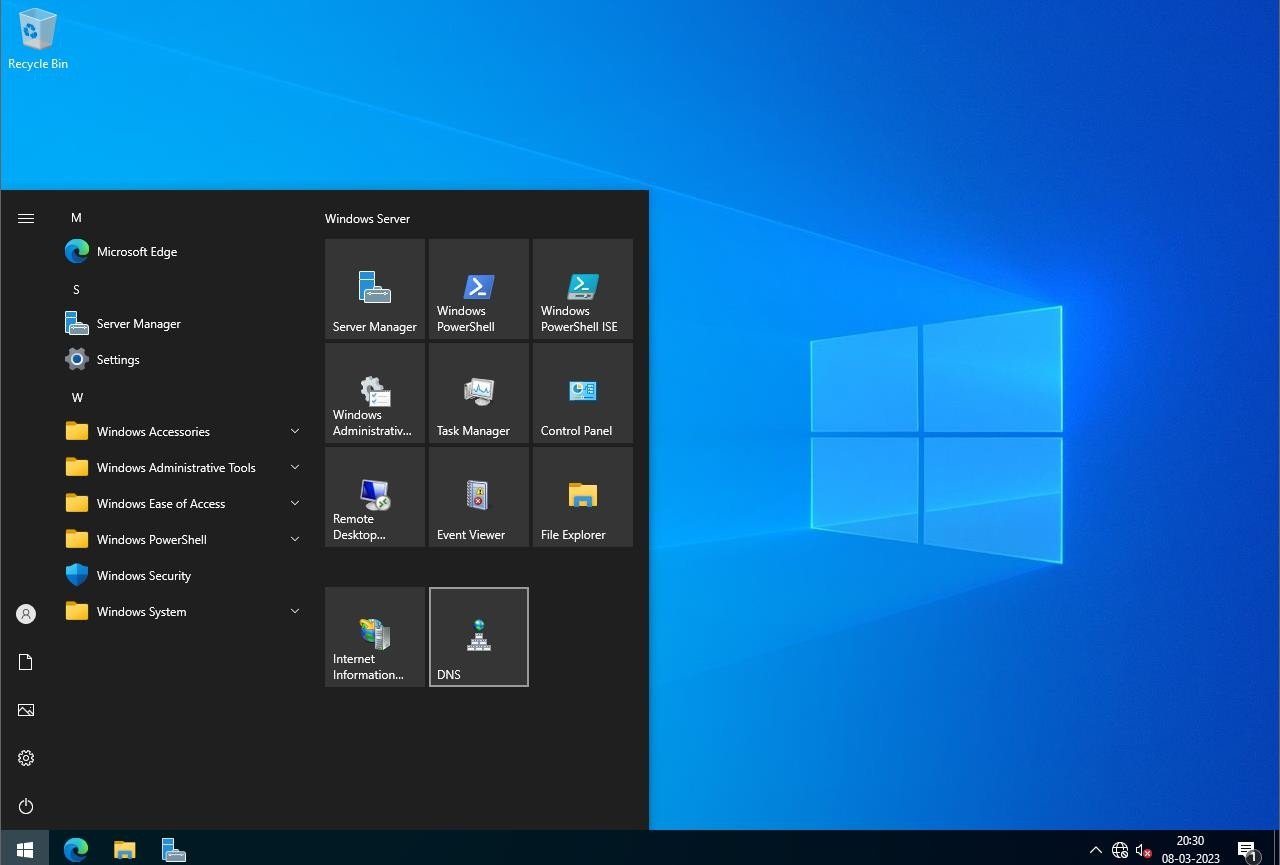
Step 1
Go to Start, select DNS
Step 2
Select Forward Lookup Zone à Right click select New Zone
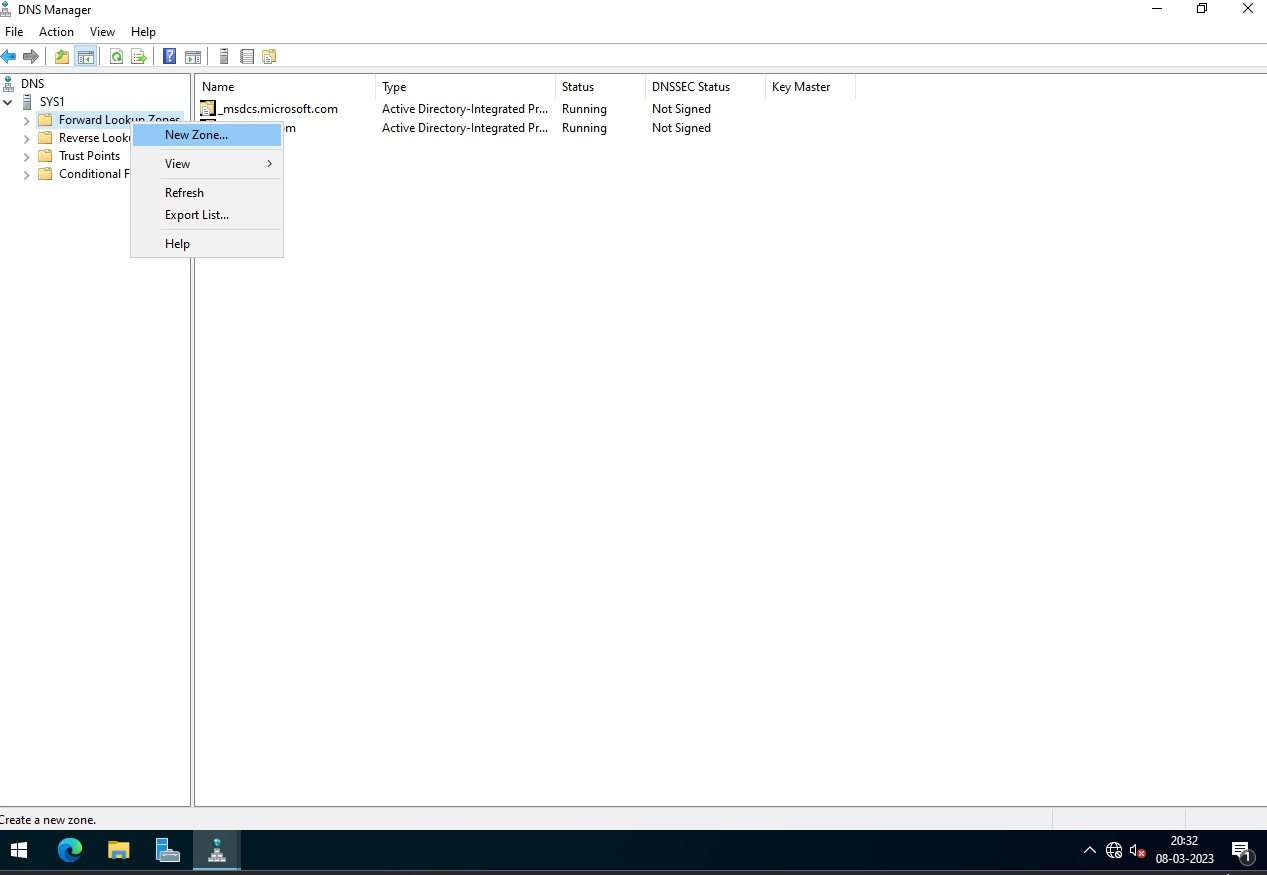
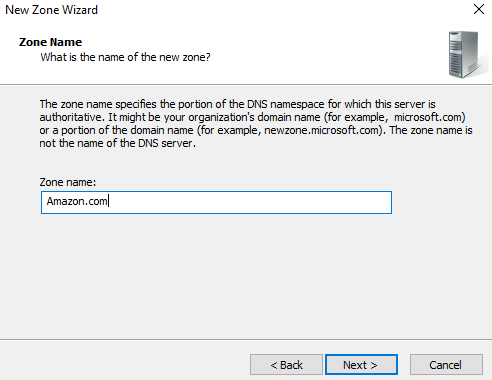
Step 3
Create a new primary zone in Forward Lookup Zone and mention the website Domain Name (EX:-YAHOO.COM)
Step 4
Select the zone à Right click select New Host
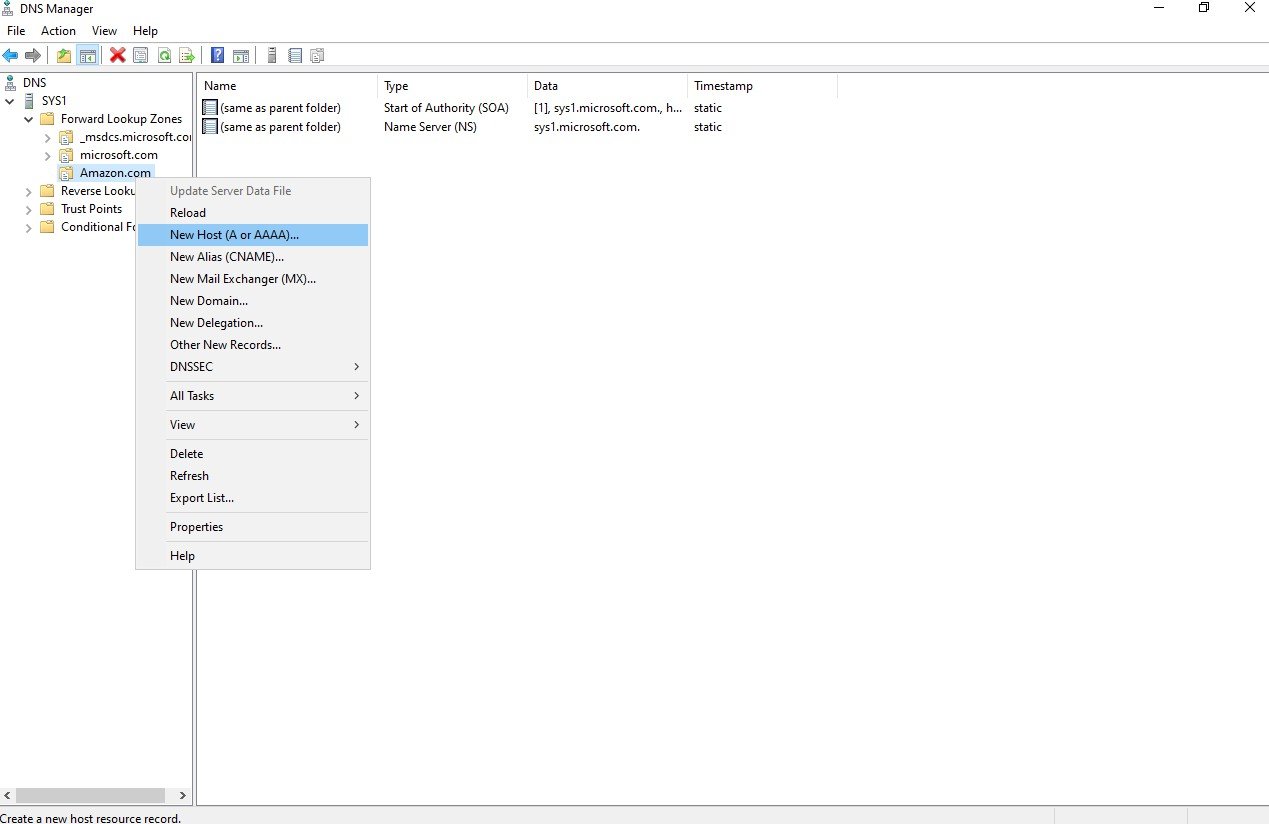
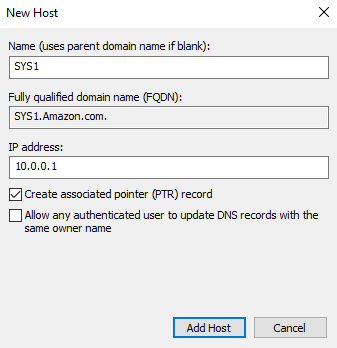
Step 5
Mention the Web Server name and IP Address à Add Host à OK à Done.
Step 6
Select the zoneà Right click select New Alias & Create an Alias (E.g: www) for the host, which you specified in the host header for the site à click OK.
Verification
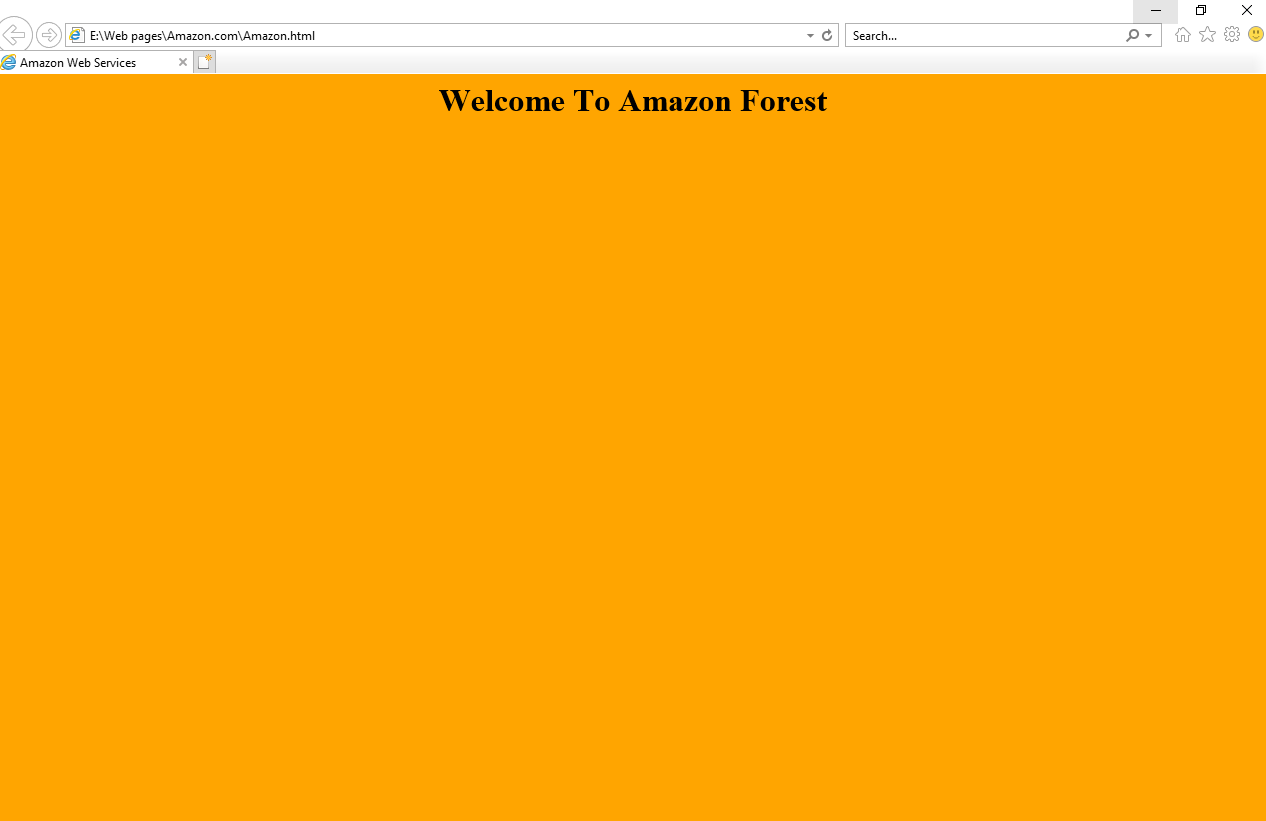
- 1. Open Internet Explorer or any browser and access the website