Prerequisites
- Before working on this lab, You must have
- A Computer with Windows Server 2022 Operating System.
- SYS1
- MICROSOFT.COM
- SYS1
- Domain Controller
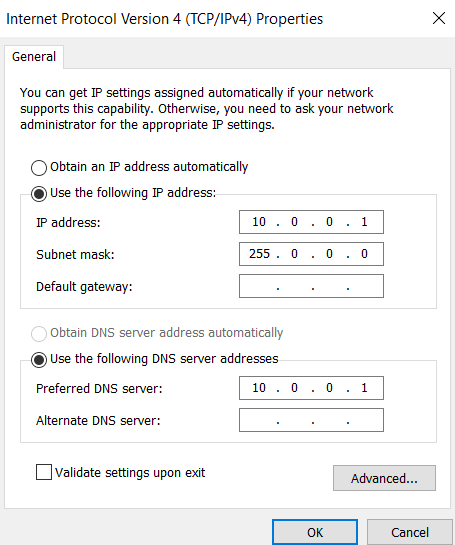
- IP Address
- 10.0.0.1
- Subnet Mask
- 255.0.0.0
- Preferred DNS
- 10.0.0.1
- Assigning IP Address
Step-by-Step Instructions
Step 1
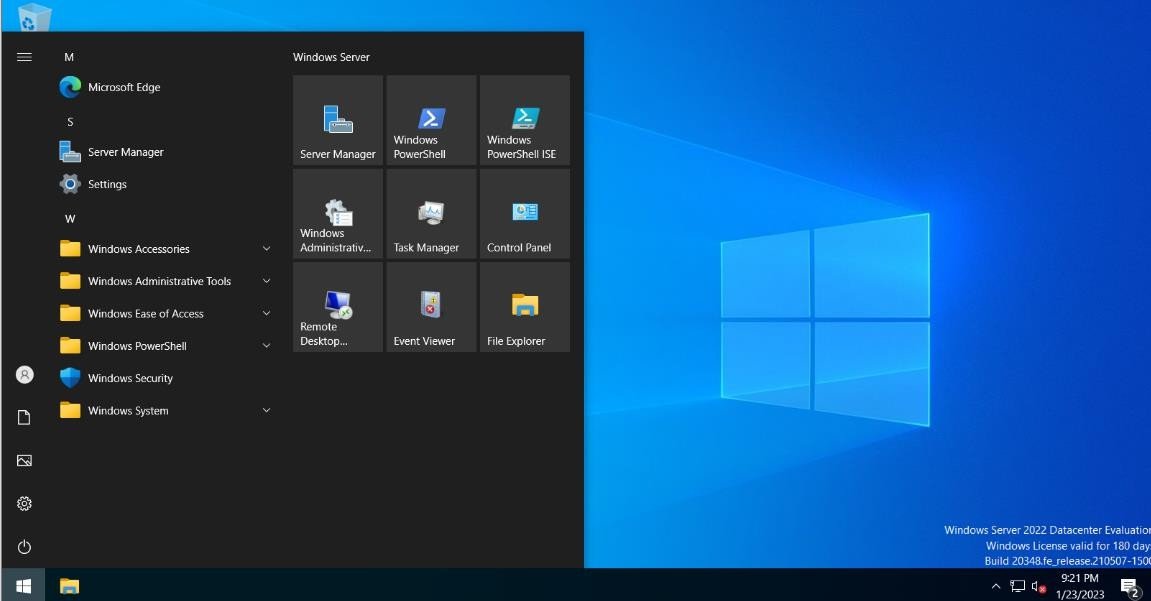
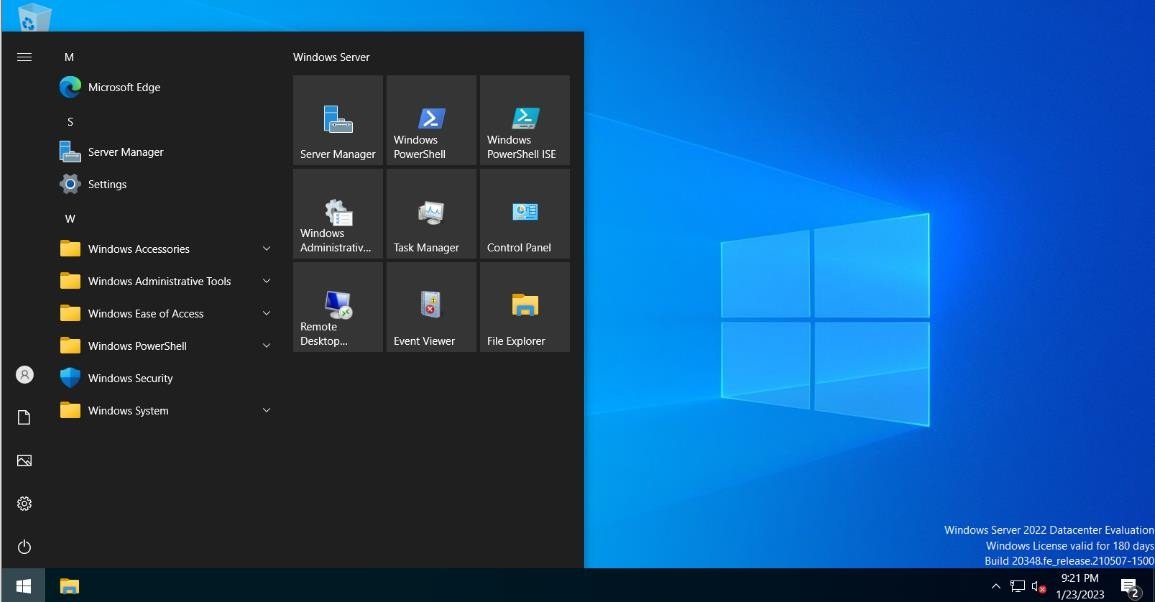
Click Server Manager.
Step 2
In Server Manager Dashboard, Click Configure this Local server, select Ethernet IPv4 address assigned by DHCP.
Step 3
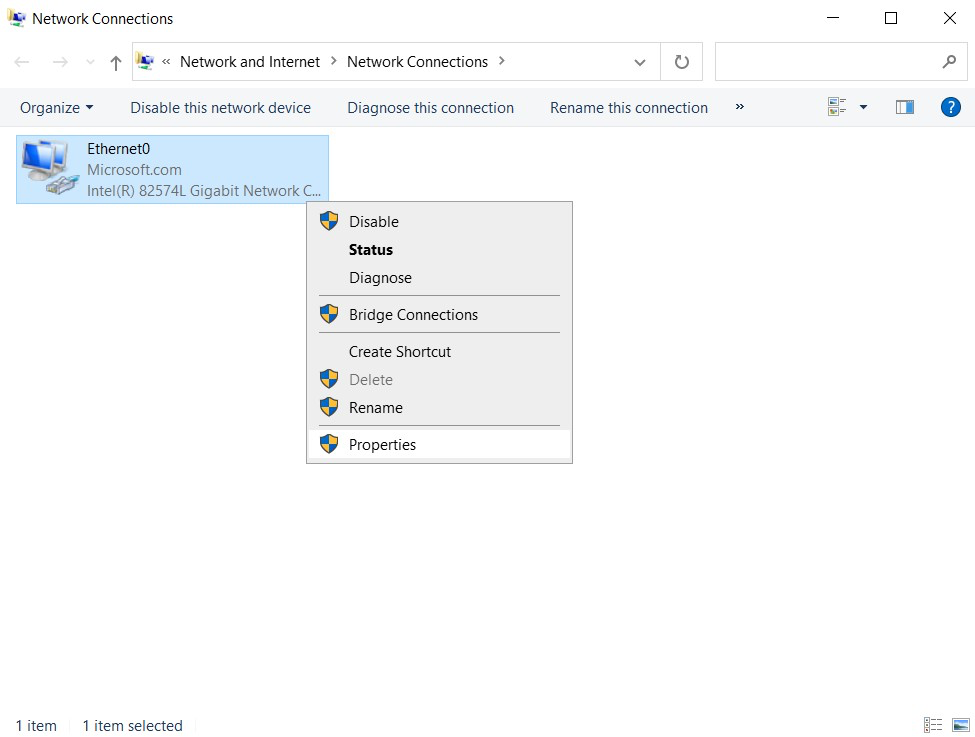
Right click Ethernet, select Properties.
Step 4
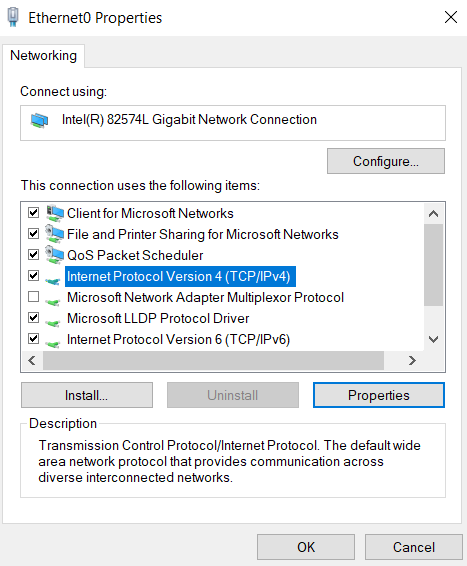
Select Internet Protocol Version 4 (TCP/IPv4) and click Properties.
Step 5
Select Use the following IP address and enter the IP address and click Subnet mask, it will be entered automatically and select Use the DNS Server addresses and enter the Preferred DNS Server address.
Step 6
Click OK, and OK. Installing Active Directory Domain Services
Step 1
Log in as Administrator to the Workgroup Computer.
Step 2
Assign IP Address and preferred DNS Server Address.
Step 3
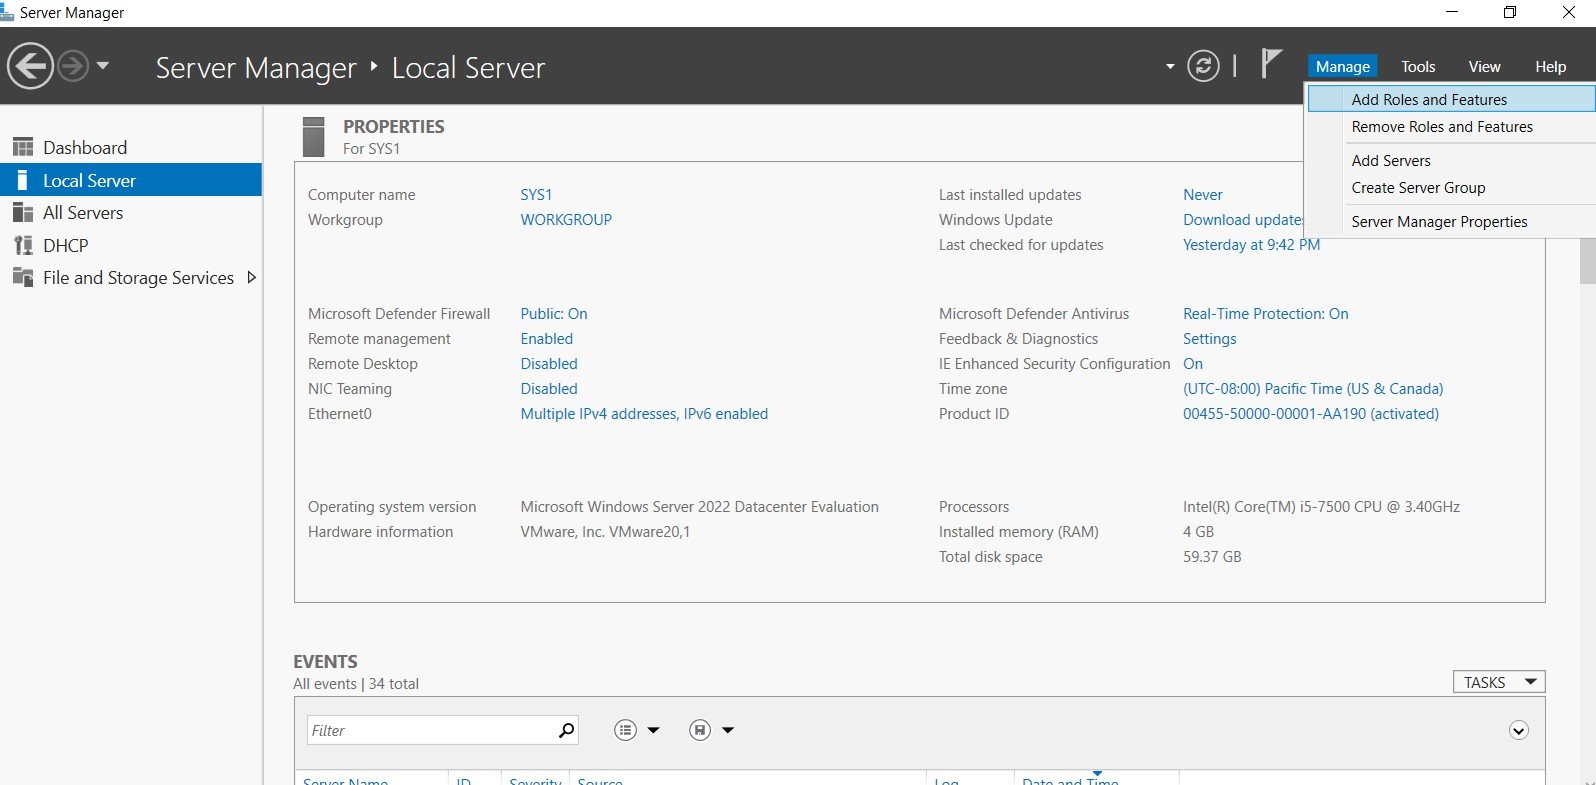
Click Server Manager. Domain Controller Host Name: SYS1
Step 4
In Server Manager Dashboard, Click Add Roles And Features.
Step 5
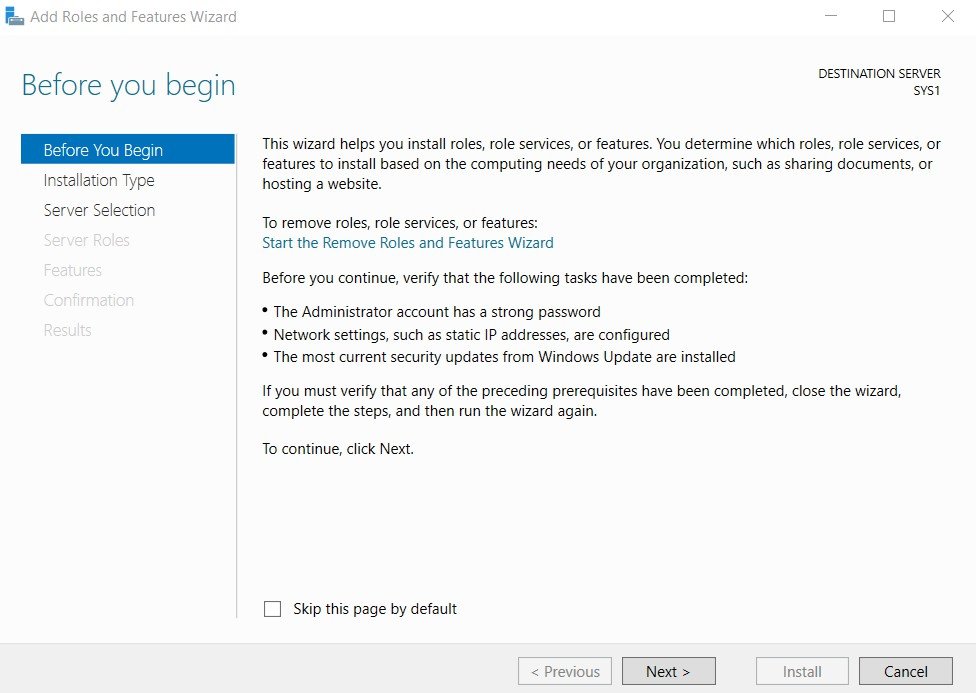
In before you begin page, click Next.
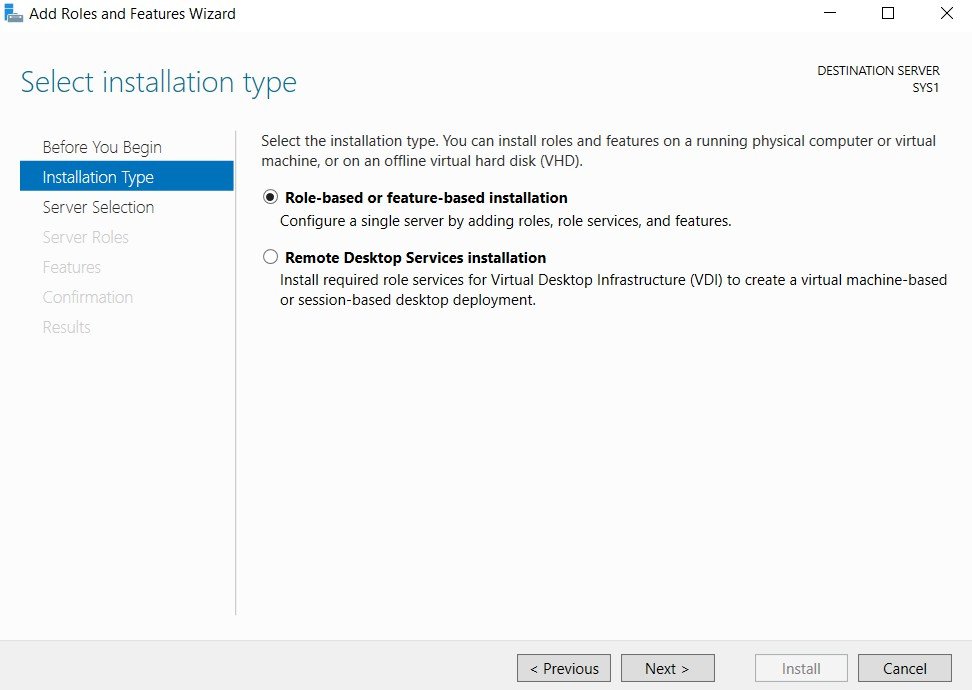
Step 6
In Select installation type, select Role-based or feature-based installation, click Next.
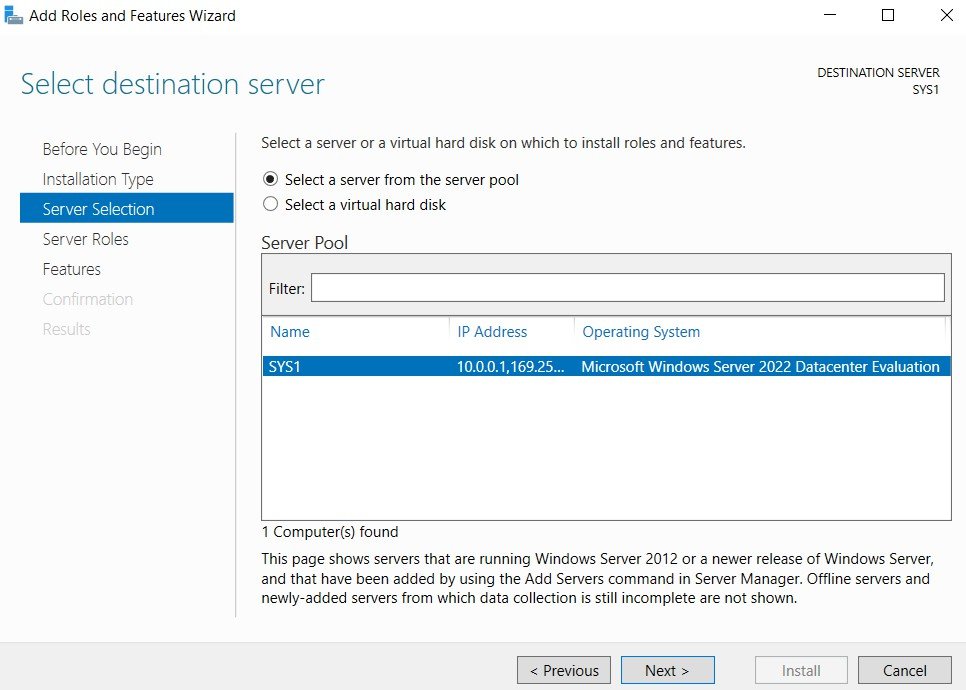
Step 7
In Select destination server, from Server Pool select SYS1, click Next.
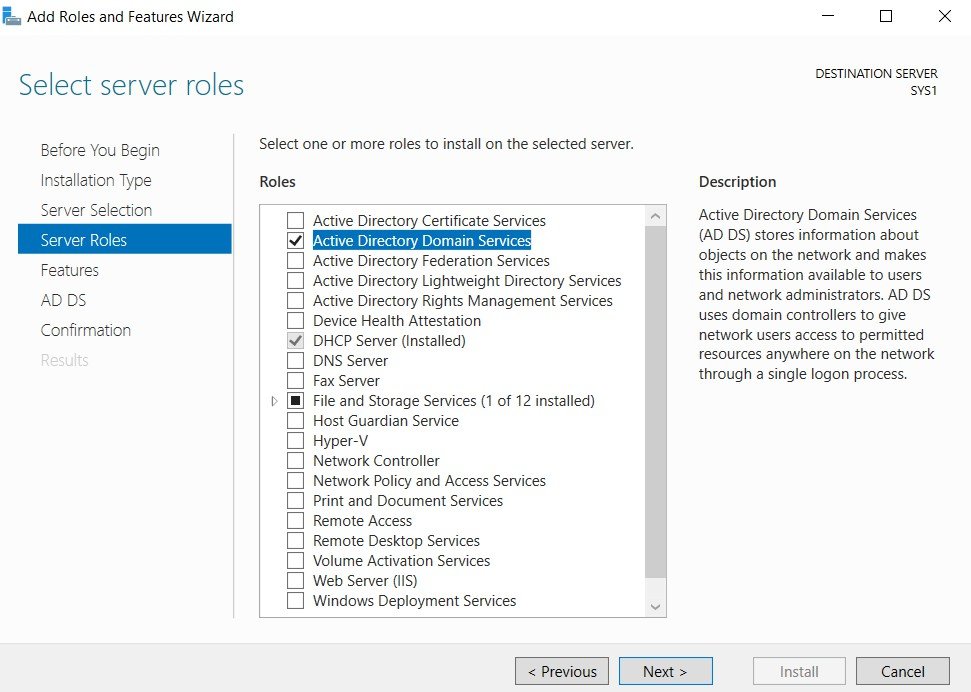
Step 8
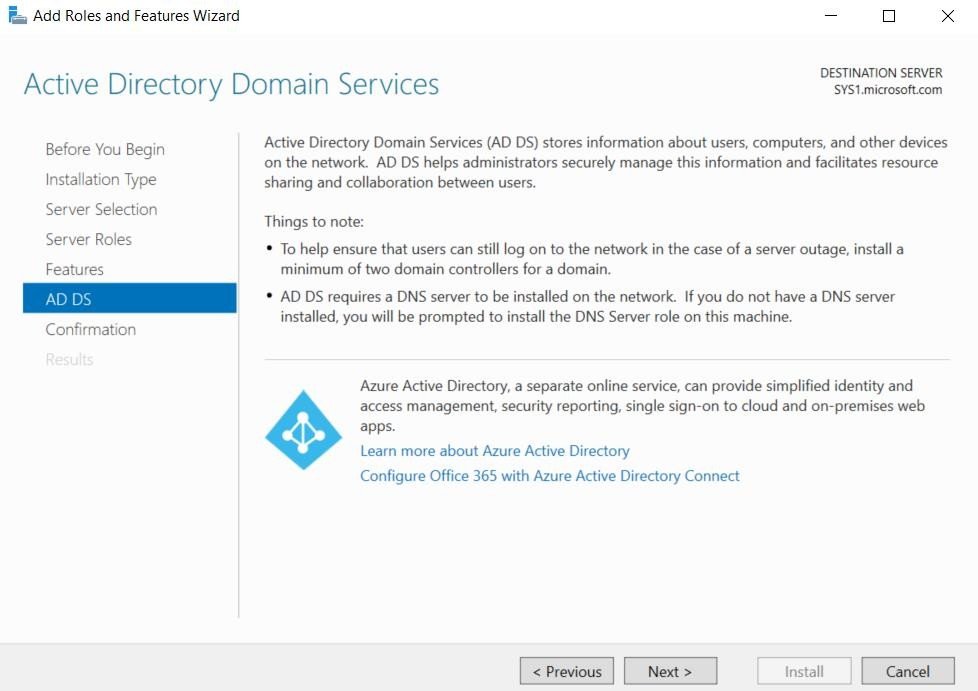
In Roles, check the box Active Directory Domain Services.
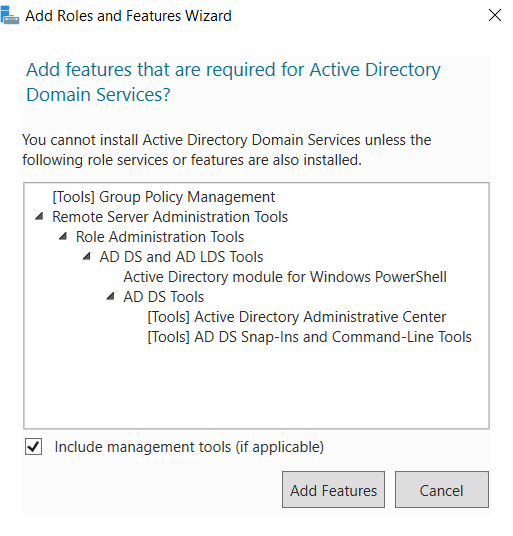
Step 9
Click Add Features, to install the required features for Active Directory Domain Services. Click Next.
Step 10
In Select features wizard, click Next.

Step 11
In Active Directory Domain Services wizard, click Next.
Step 12
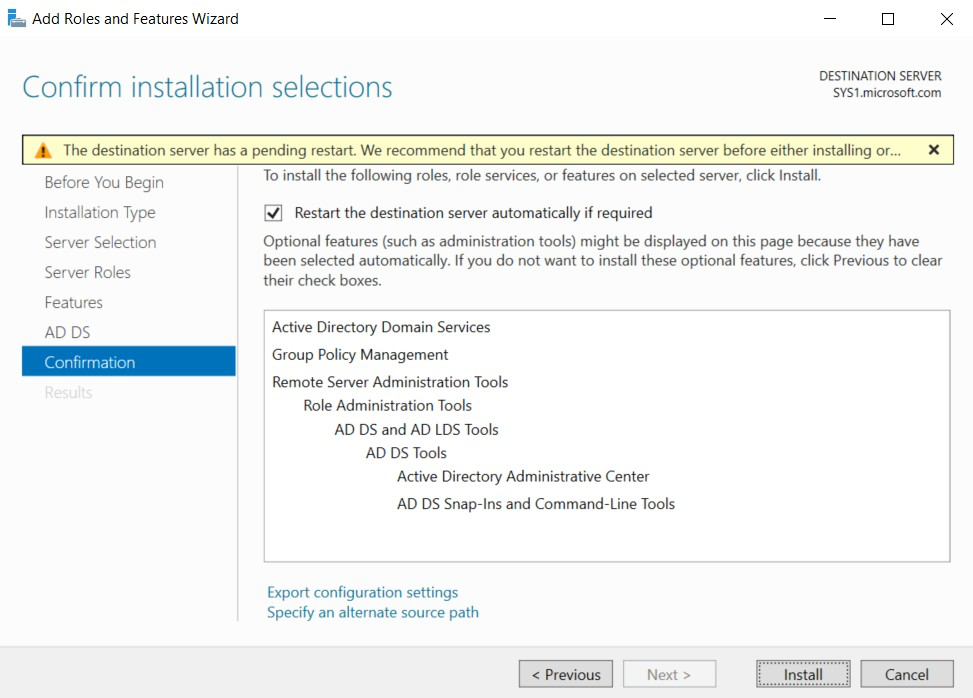
Check the box Restart the destination server automatically if required. Click Install.
Step 13
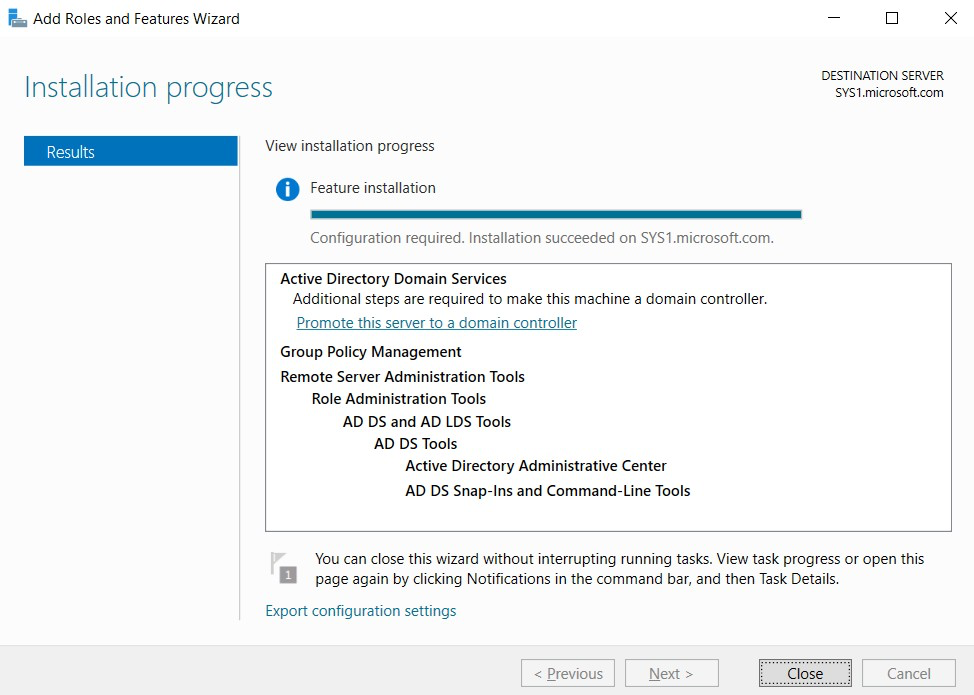
Click Promote this server to a domain controller.
Step 14
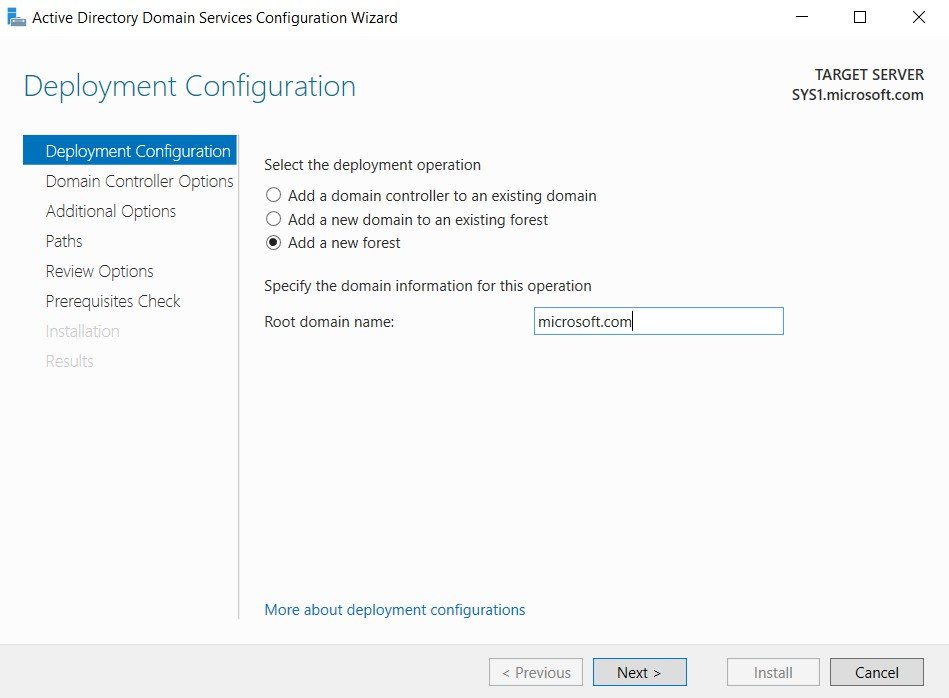
In Deployment Configuration wizard, select Add a new forest, enter the Root domain name Ex.Microsoft.com.
Step 15
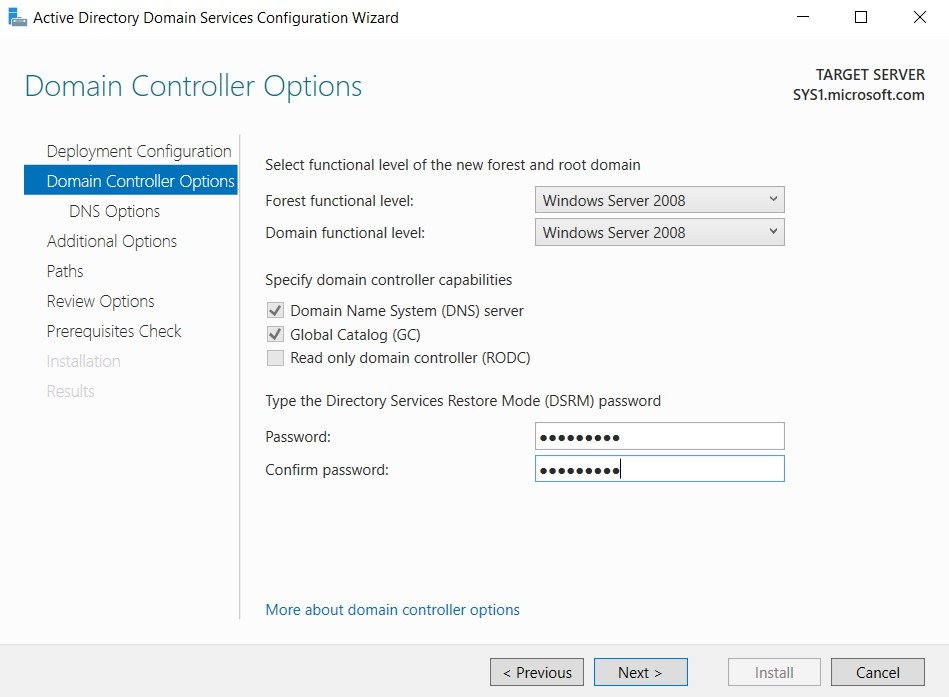
In Domain Controller Options, change Forest and Domain functional level to Windows Server 2008, and Domain Name System server. Type the Directory Services Restore Mode Password and Confirm Password and click Next.
Step 16
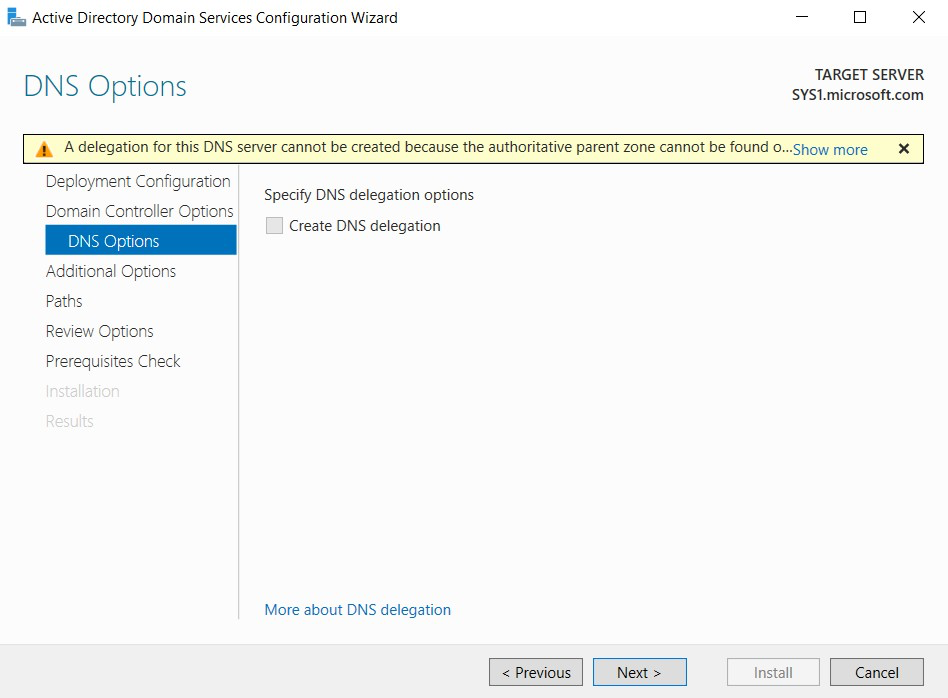
On DNS Options page, click Next.
Step 17
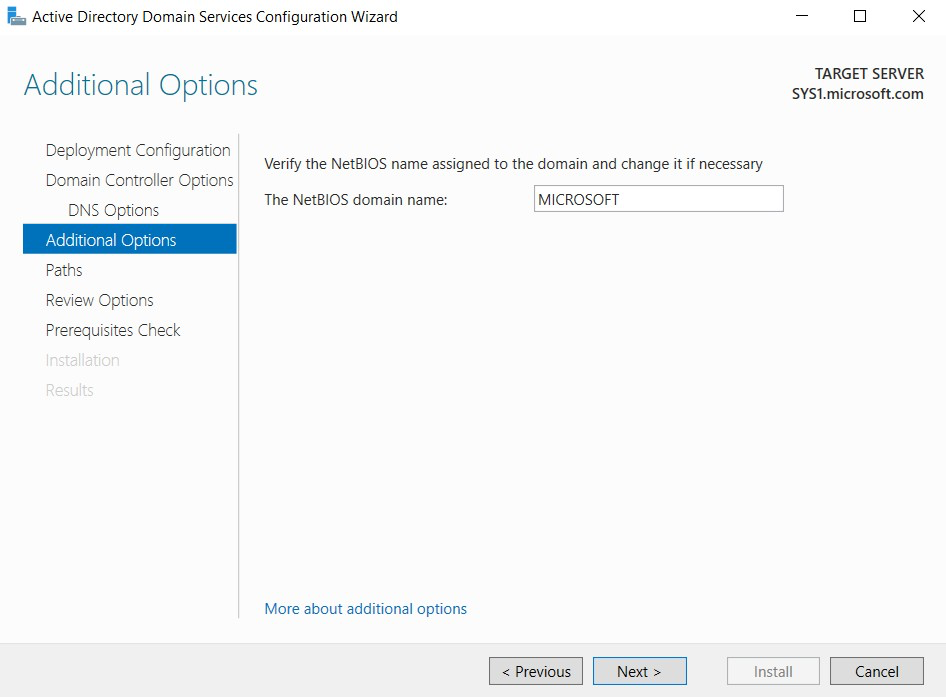
Verify the NetBIOS domain name (Ex: MICROSOFT), click Next.
Step 18
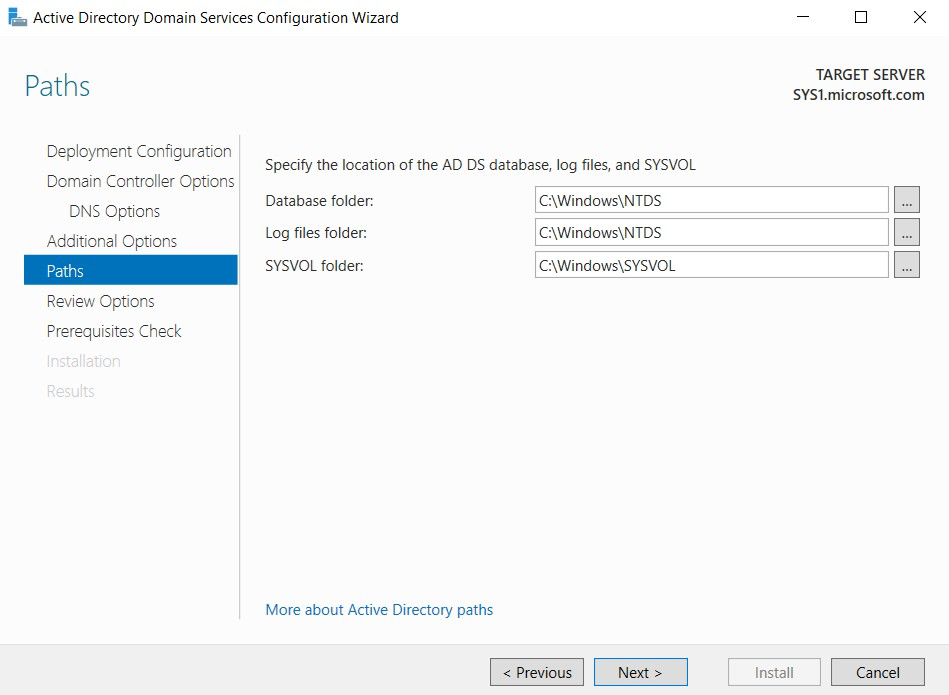
Verify the location of the AD DS database, log files, and SYSVOL, click Next.
Step 19
Review the Summary and click Next.
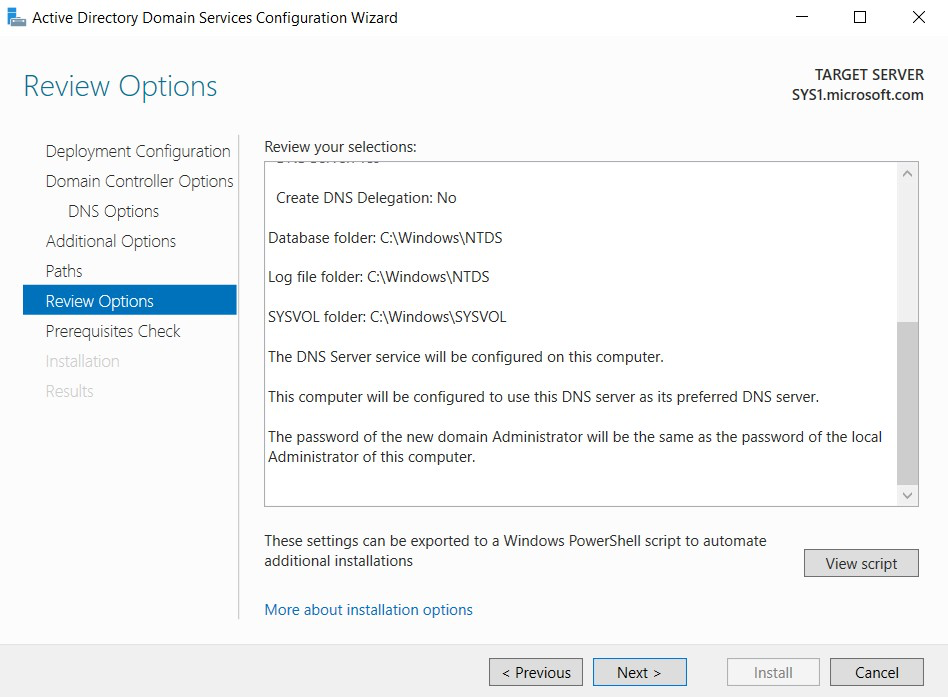
Step 20
Click Install to begin installation.
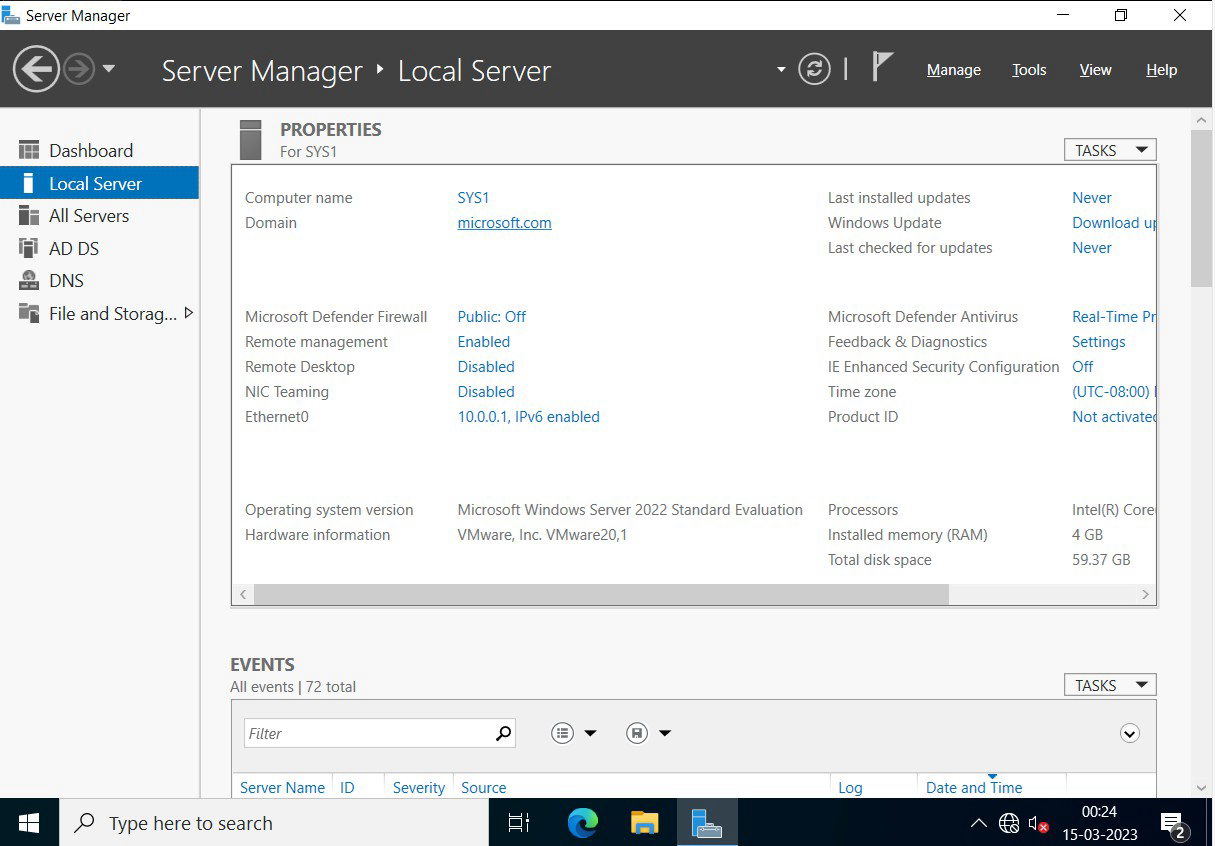
Verification
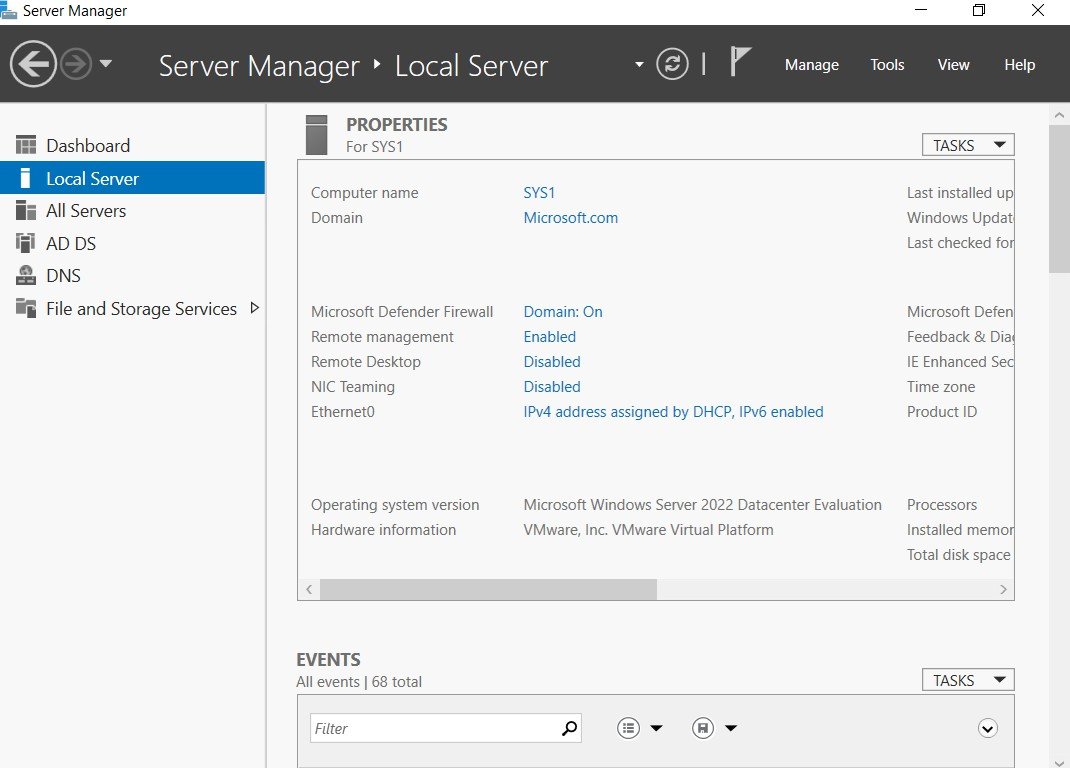
- 1. Click Server Manager.
- 2. In Server Manager, Select Local Server and verify for domain Microsoft.com.