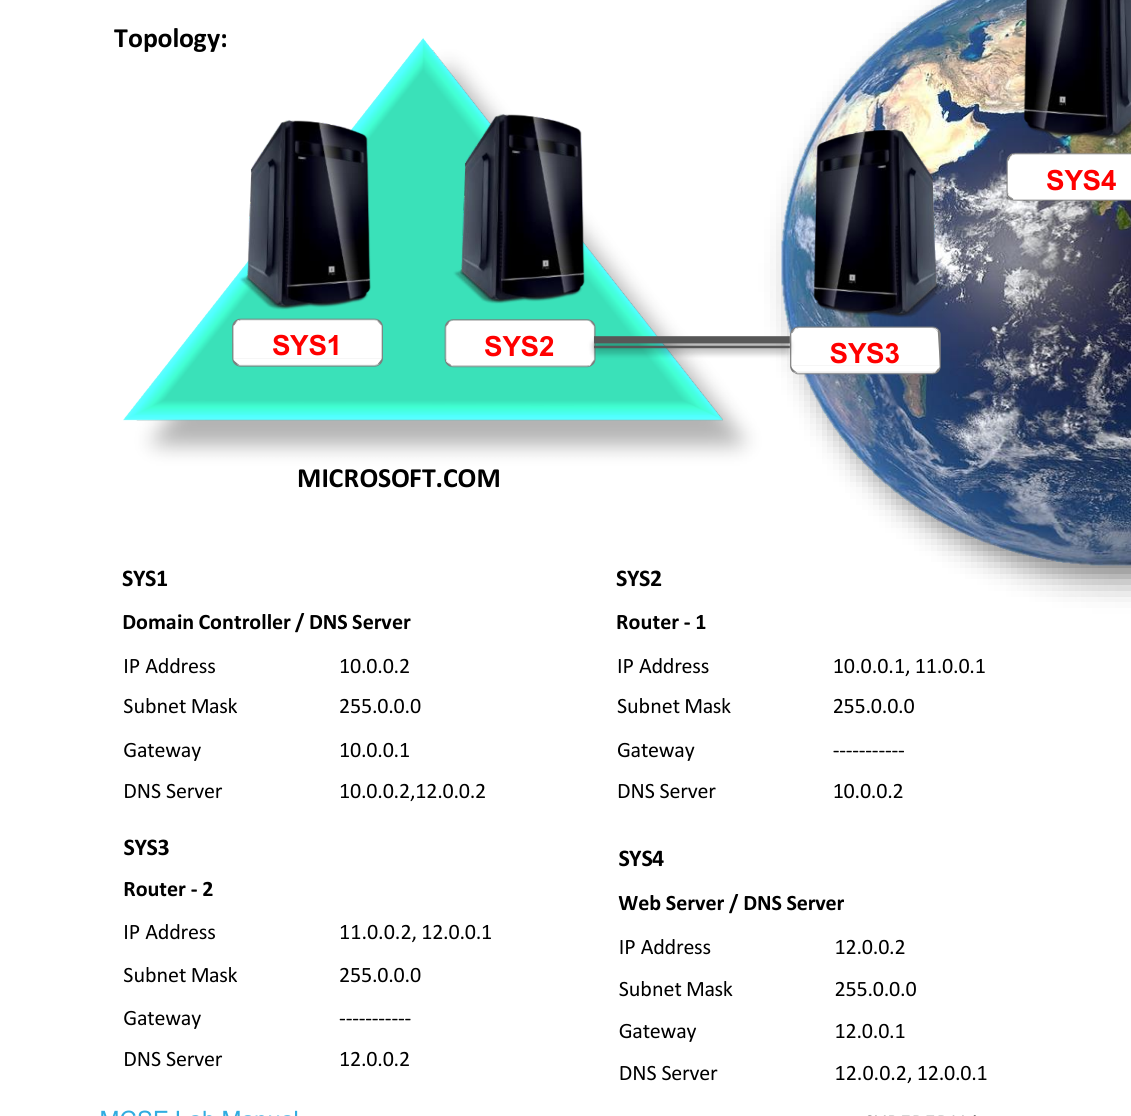
Prerequisites
- Before working on this lab, You must have
- A Computer Running Windows Server 2022 Domain Controller.
- 2 Computer Running Windows Server 2022 With Minimum 2 NIC Cards.
- A Computer Running Windows Server 2022 Web Server.
- Assigning the IP Address to Configure Routing
- ON PRIVATE:
Network Topology
Step-by-Step Instructions
Step 1
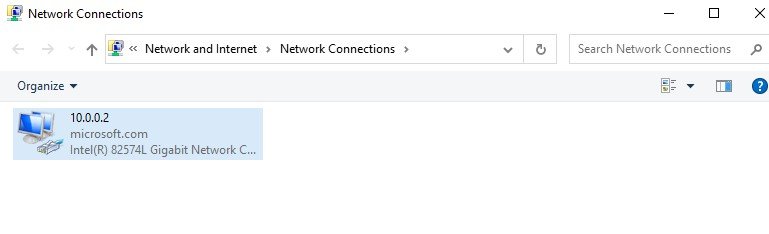
Logon to Private. PRIVATE
Step 10
0.0.2
Step 2
Check IP Settings: Go Server Manager à Local Server à click 10.0.0.2, Right click NIC card à click Properties
Step 3
Right click NIC card à click Properties à Internet Protocol Version4 (TCP/IPv4) à Properties à Define the IP address as mentioned below. ON ROUTER1:

Step 1
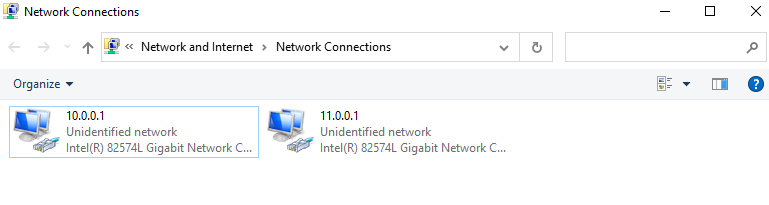
Logon to Router1
ROUTER-1
Step 10
0.0.1 11.0.0.1
Step 2
Check IP Settings: Go Server Manager à Local Server à click 10.0.0.1, Right click NIC card à click Properties è Internet Protocol Version 4 (TCP/IPv4) à Properties à Define the IP address as mentioned below. ON ROUTER2:
Step 1
Logon to Router2
ROUTER-2
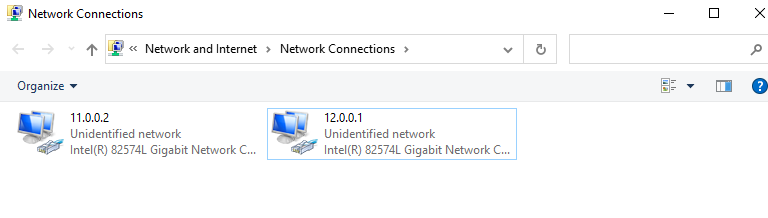
Step 11
0.0.2 12.0.0.1
Step 2
Check IP Settings: Go Server Manager à Local Server à click 11.0.0.2, Right click NIC card à click Properties è Internet Protocol Version 4 (TCP/IPv4) à Properties à Define the IP address as mentioned below. ON PUBLIC:
Step 1
Logon to Public PUBLIC

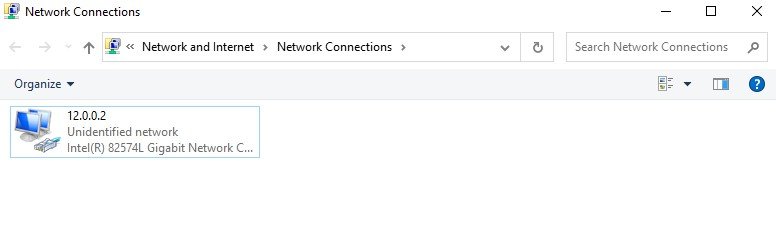
Step 12
0.0.2
Step 2
Check IP Settings: Go Server Manager à Local Server à click 12.0.0.2
Step 3
Right click on NIC card à click Properties à Internet Protocol Version 4 (TCP/IPv4) à Properties à Define the IP address as mentioned below. Installing Routing Service on Router1 & Router2

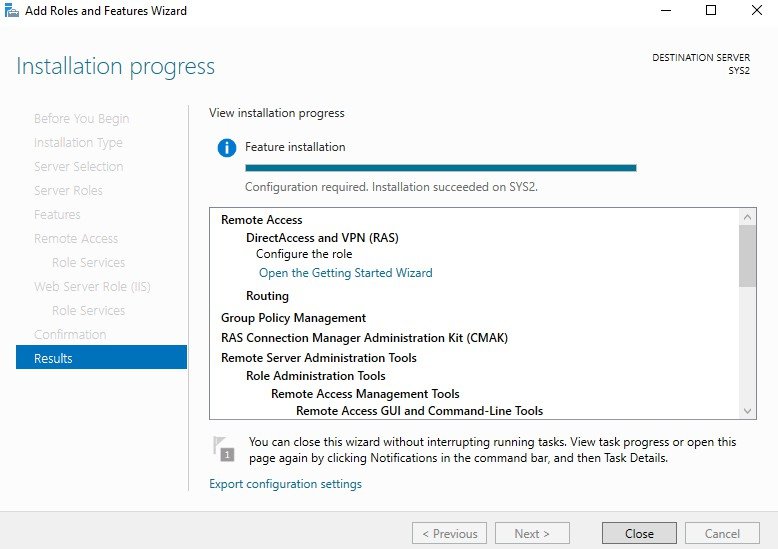
Step 1
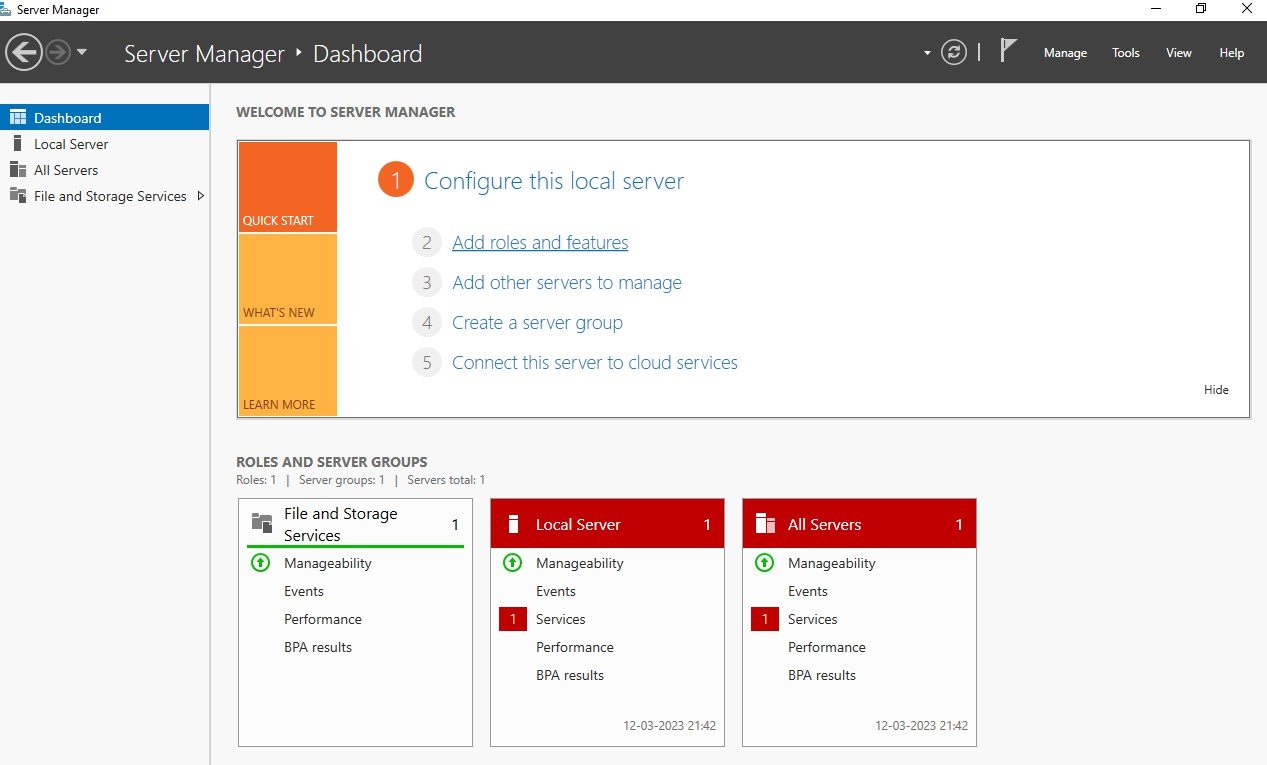
Click Server Manager
ROUTER-1
Step 10
0.0.1 11.0.0.1
Step 2
Select Add roles and features.
Step 3
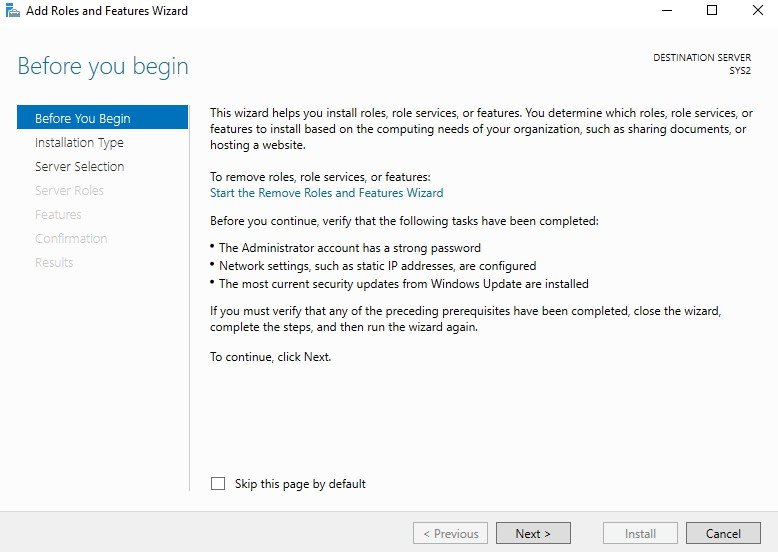
In Before you begin page, click Next.
Step 4
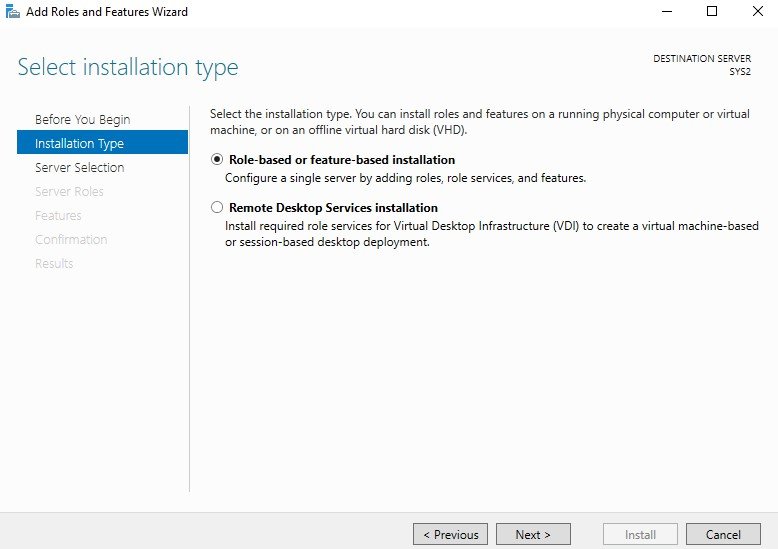
Select Role-based or feature-based installation à click Next
Step 5
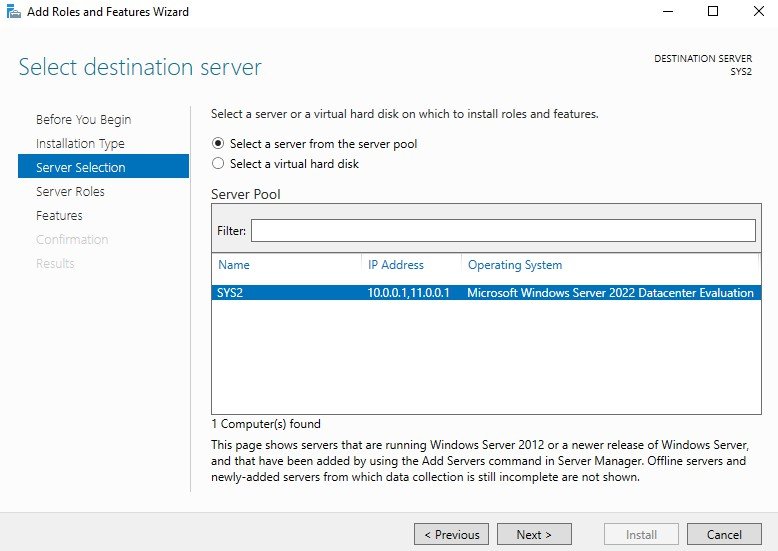
Select a server (SYS2.Microsoft.com) from the server pool and click Next.
Step 6
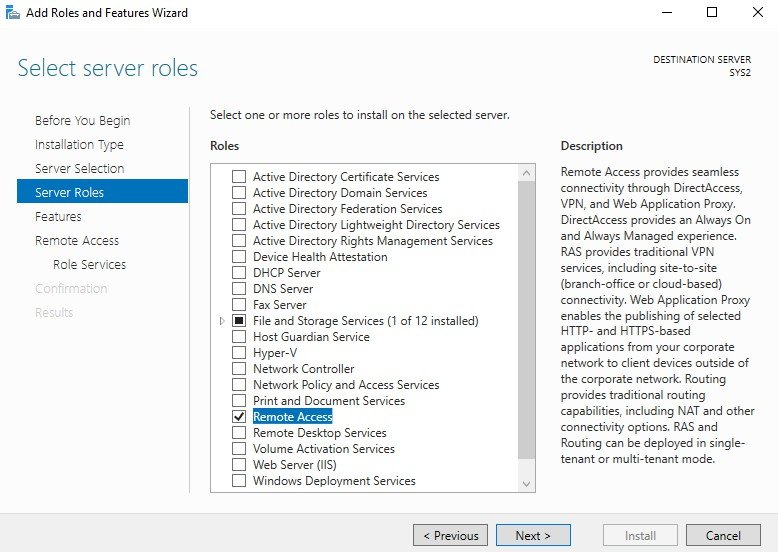
In select server roles, check the box Remote Access.
Step 7
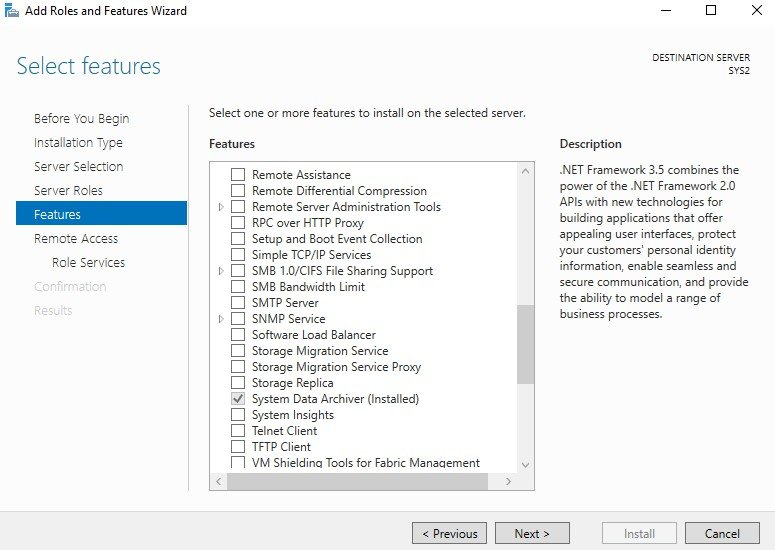
In Select features wizard, click Next.
Step 8
In Remote Access Page, click Next.
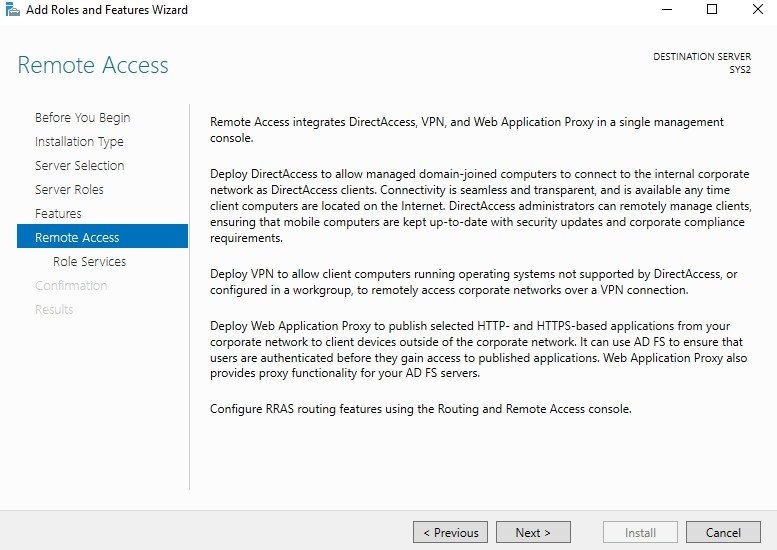
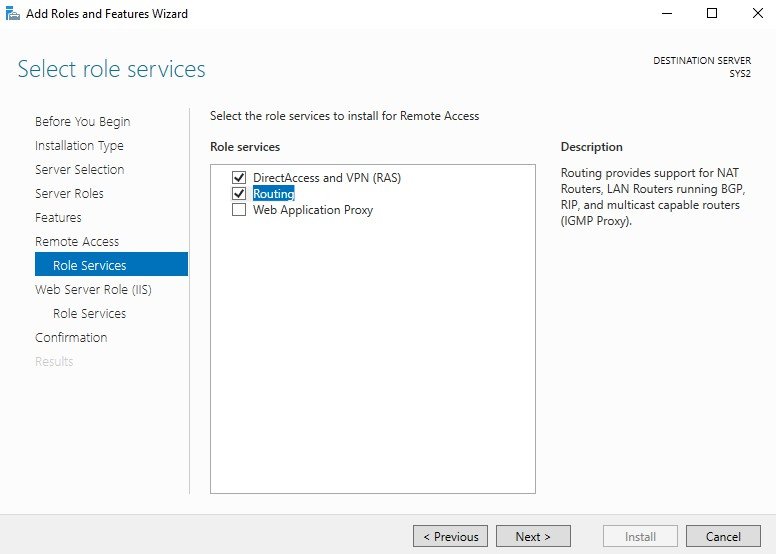
Step 9
Check the box Routing, click Next.
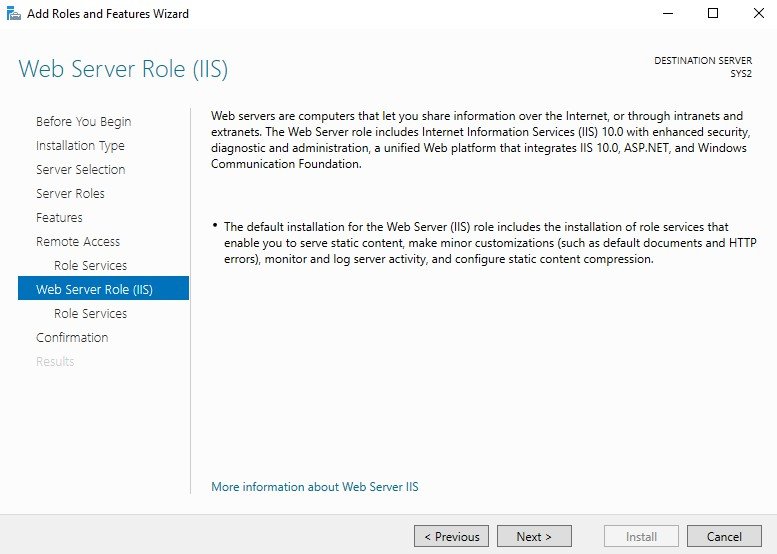
Step 10
In Web Server Role (IIS) Page, click Next.
Step 11
Check the box Restart the destination server automatically if required. Click Install.
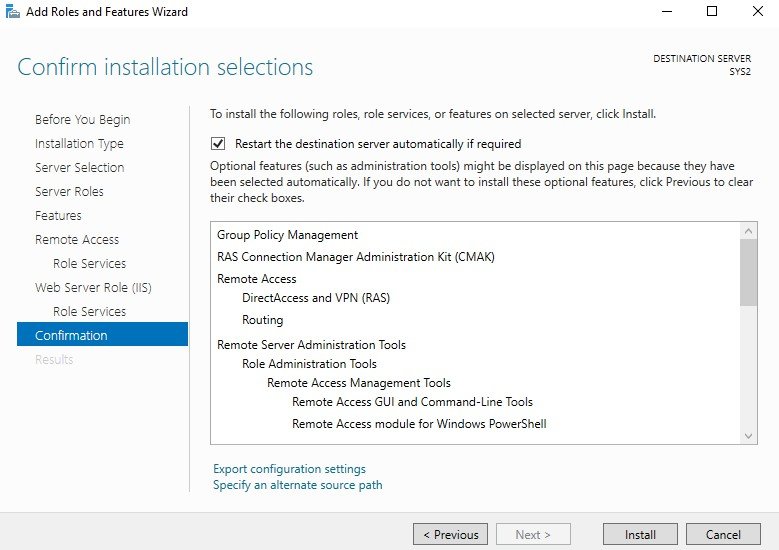
Step 12
Click Close. Note: Repeat the process of SYS2 on Router-2 (SYS3) also. Enabling Routing on Router1 & Router2
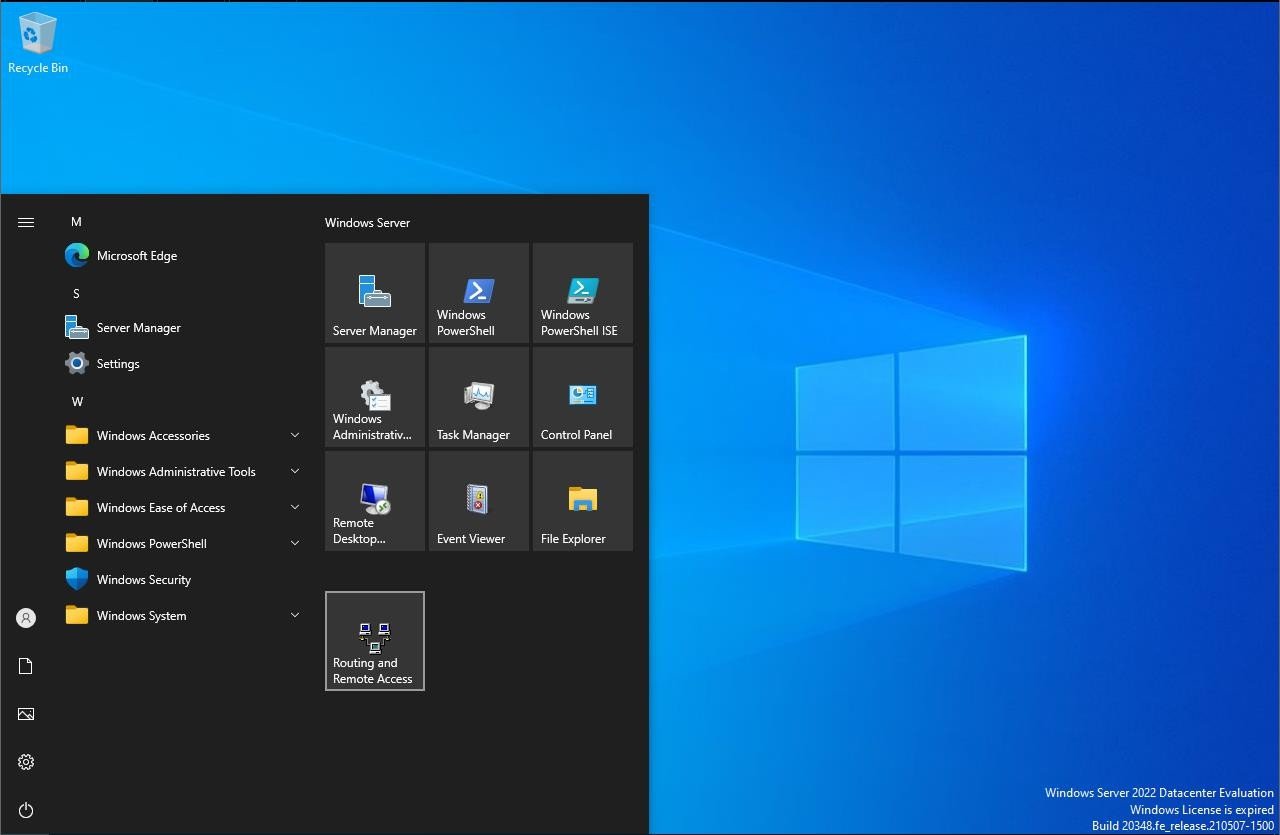
Step 1
Go to Start, select Routing and Remote Access.
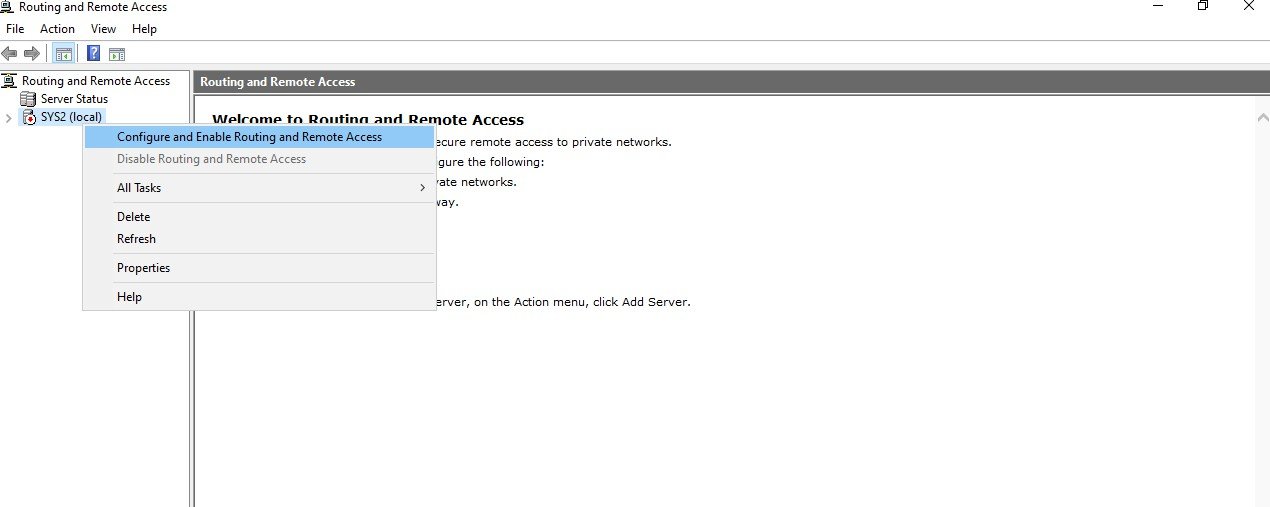
Step 2
Right click on system name Configure and Enable Routing and Remote Access.
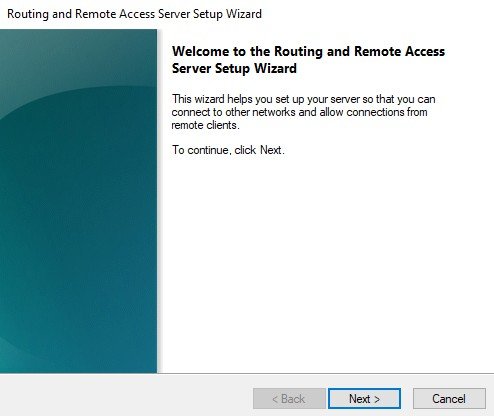
Step 3
Click Next
Step 4
Select Custom configuration à click Next.
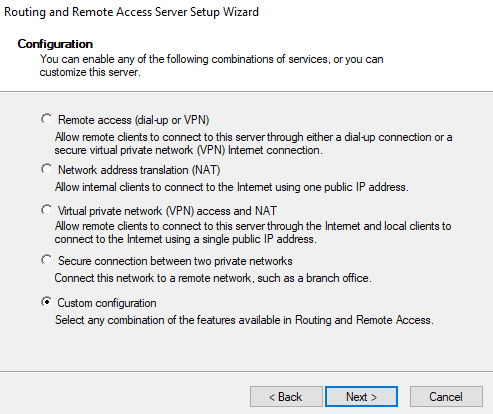
Step 5
Select LAN routing à Next
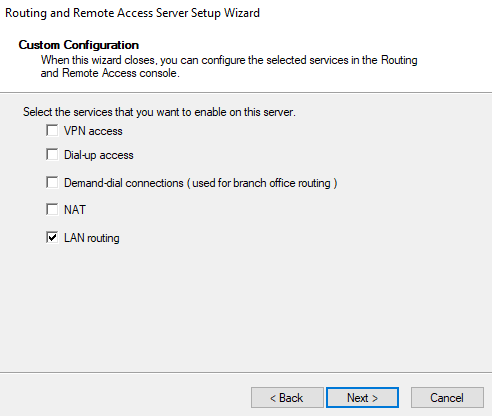
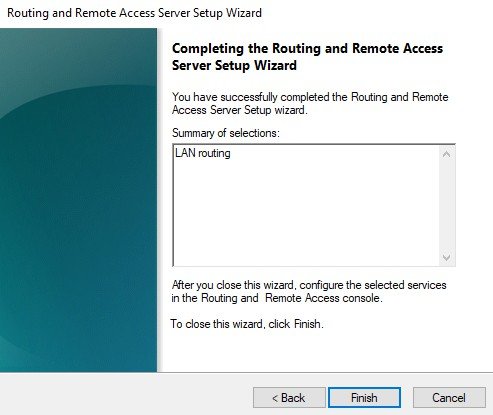
Step 6
Click Finish
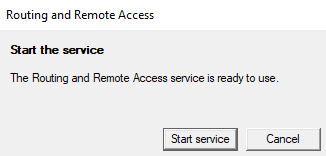
Step 7
Click Start service Note: Repeat the process of SYS2 on Router-2 (SYS3) also. Configuring Static Routes ON ROUTER1:
Step 1
Go to Routing and Remote access à Expand System name à Expand IPv4 à Select Static Routes à Right click and select New Static Route
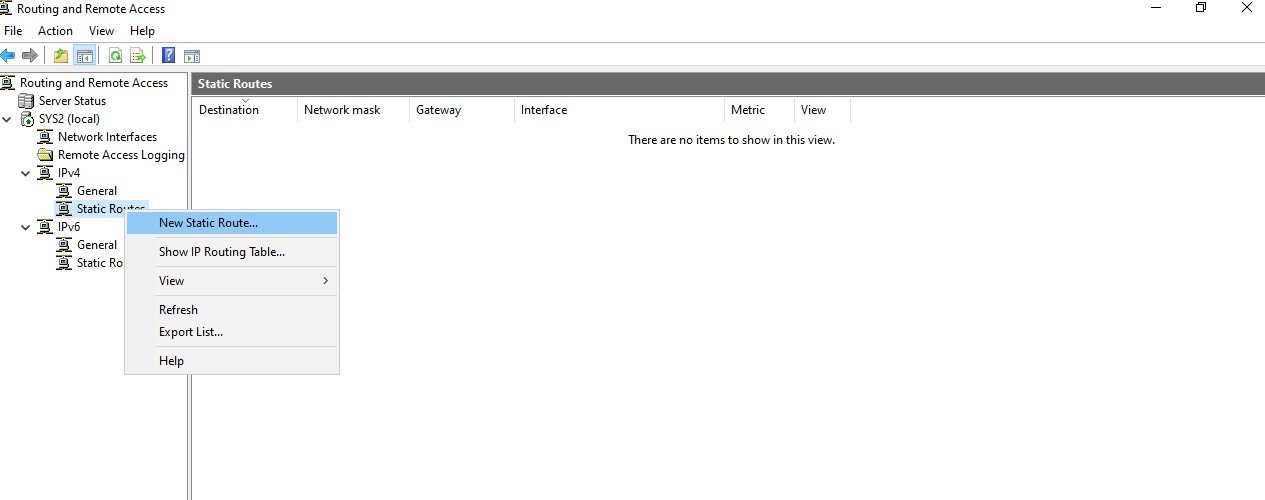
Step 2
Define the static route as mentioned below à click OK. Interface
Step 11
0.0.1 Destination
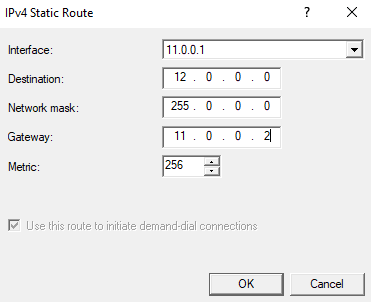
Step 12
0.0.0 Network Mask
Step 255
0.0.0 Gateway
Step 11
0.0.2 Metric ON ROUTER1:
Step 1
Go to Routing and Remote access à Expand System name à Expand IPv4 à Select Static Routes à Right click and select New Static Route
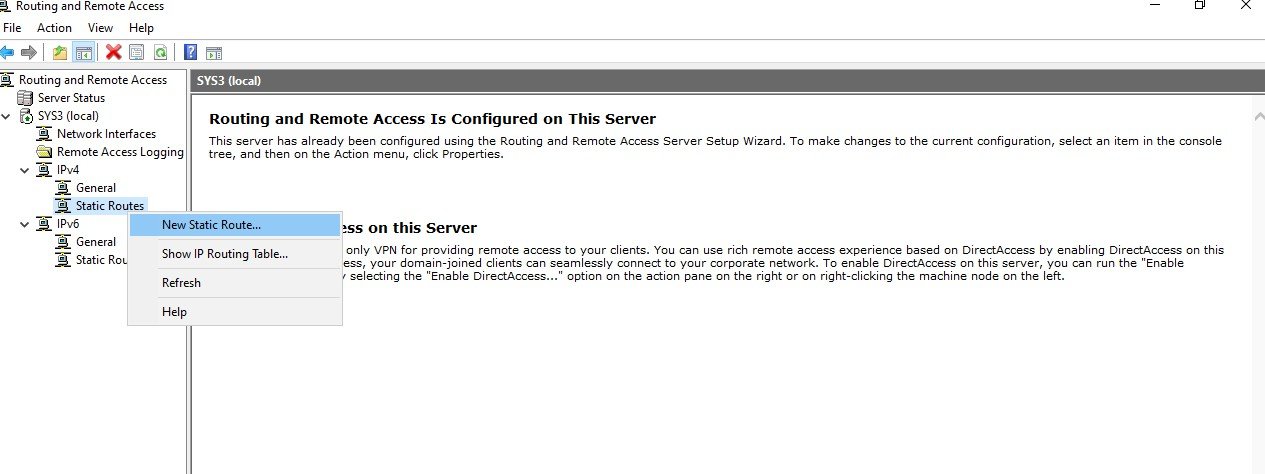
Step 2
Define the static route as mentioned below à click OK. Interface
Step 11
0.0.2 Destination
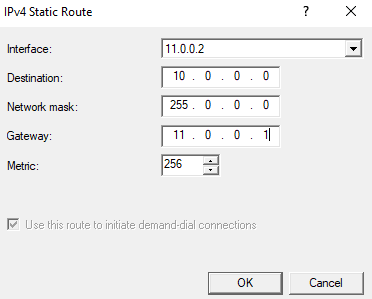
Step 10
0.0.0 Network Mask
Step 255
0.0.0 Gateway
Step 11
0.0.1 Metric
Verification
- 1. Check the connectivity between 10.0.0.0 and 12.0.0.0 Networks.
- 2. Log on to SYS4 (12.0.0.2) à Open command prompt, Ping 10.0.0.2 -t and verify for
- reply.
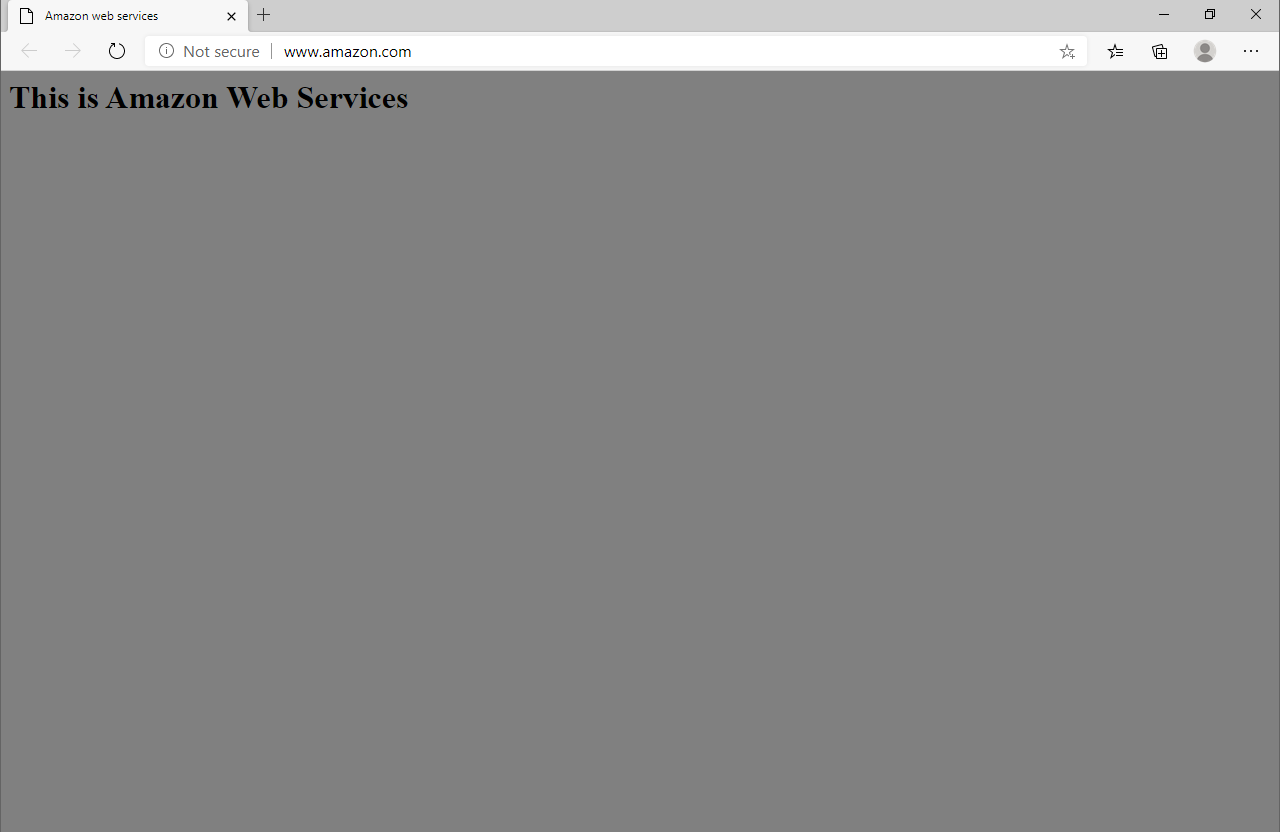
- 3. log on to SYS1 (10.0.0.2) à Open the Internet Explorer and access the website
- www.amazon.com (Website is present on 12.0.0.2), to verify the communication
- between both networks.